Showing posts with label North Portland. Show all posts

Toot! Toot!*: 'iheartlogos' third volume gives logo love to Jeff Fisher LogoMotives identity designs

The newly released book iheartlogos season three features two logo designs by Jeff Fisher, the Engineer of Creative Identity for the Portland-based firm Jeff Fisher LogoMotives.. The inspiration-filled volume, published through the iheartlogos website, features 391 logos created by 121 designers from 20 countries around the world.

The Jeff Fisher LogoMotives designs showcased (above) are the logo for the North Portland Business Association (representing businesses in the designer's own neighborhood) and the safe sex self-promotion design for A Rubber's Ducky.

The identity re-design for the North Portland Business Association took the industrial history of the area, prominent landmarks and the familiar local blue heron into consideration as design elements. The symbol also appears in the books Logos From North to South America (Spain) and the Big Book of Logos 5.

A duck's head doubling as the shape of a condom, with a reservoir-tip, was a subtle "life preserver" message in the A Rubber's Ducky safe sex image. The logo appears in the books New Logo & Trademark Design (Japan), The New Big Book of Logos, LogoLounge - Volume 1, New Logo & Trademark Collection (Japan) and Logos from North to South America (Spain).

Logo images included in the book were judged and voted on by other designers submitting logos, and individuals registered to vote, at the website iheartlogos.com. The limited edition book is currently available exclusively on the site, for $25. Season four of the iheartlogos competition is currently accepting logo entries.

Fisher, a 35 year design industry veteran, is the author of Identity Crisis!: 50 redesigns that transformed stale identities into successful brands and The Savvy Designer's Guide to Success: Ideas and tactics for a killer career. Other book projects are currently in the works.

The designer has received over 600 design awards and his work has been published in more than 160 books on identity design, self-promotion and the marketing of small businesses. He often travels – nationally and internationally – to present courses, seminars and workshops on design, branding, marketing and social networking. In addition, Fisher is a nationally-recognized speaker, making numerous presentations each year to design organizations, design schools, universities and business groups.

More information about Jeff Fisher, and his design and writing efforts, may be found on the Jeff Fisher LogoMotives blogfolio.

(* If I don’t "toot!" my own horn, no one else will.)

© 2012 Jeff Fisher LogoMotives

Simple garden hose guide & plant protector [Redux]

[With hot summer weather causing me to do a little more hand-watering than usual, I've realized that I need to make a few more of my DIY hose guides. Here's a "rerun" of the original post on my past garden project. Happy gardening!]

One of my greatest passions, and best forms of therapy, outside of work is my garden. Although the entire garden is most often watered by a timer- operated irrigation and drip system, occasionally there is a need to do extra watering using the garden hose. I always hate to be dragging the hose across the driveway, sidewalk or patio and have it attempt to decapitate plants in the garden.

I've looked at various hose guides at garden stores and I'm just too cheap to pay what is asked. I'd heard of people making the guides using lengths of pipe with ornamental lamp finials on top. Again, most lamp finials I like are too expensive for me to use in such a manner. A few weeks ago at Lowe's I found some aged bronze swirl drawer pulls on sale for $1.28 a piece - and I'd discovered my hose guide ornaments. So, with a 37-cent copper cap, a $1.42 piece of rebar, and about $1.00 worth of copper pipe, I had my hose guide materials for just over $4.00.

The materials needed for one hose guard (shown above) are:

• 1 piece of 1/2 inch copper pipe cut to 10 inches in length

• 1 copper cap for 1/2 inch pipe

• 1 piece of 3/8 inch rebar cut to 24 inches in length

• 1 ornamental brass or bronze drawer pull

• 1 metal screw (comes with drawer pull)

The tools needed include:

• a tape measure

• a handheld pipe cutter (available at the hardware store)

• a hacksaw (to cut the rebar and screw)

• an electric drill

• the necessary solder and soldering equipment

• steel wool, sandpaper or a tool made for roughing up the pipe surfaces to be joined

• a container of flux and the necessary brush for "painting" it on the copper tubing

• a pair of gloves with a non-skid palm surface for assistance in holding the pipe while it is being cut

The project process was actually fairly simple. The most effort was required in cutting the rebar and copper pipe to the proper lengths. It was also necessary to cut the screw that came with the drawer pull to about half of its length.

I used an electric drill to create a hole in the copper cap to screw on the drawer pull. Once the drawer pull was tightly screwed onto the cap, Ed soldered the screw in place within the cap to prevent movement (you could super glue the screw in place if desired). He then soldered the copper cap to the 10-inch length of copper pipe (again, you could super glue it on for ease).

I then stuck the piece of rebar into the ground, at the corner of the flower bed, until 10 inches of the rebar was left above the surface. The copper pipe fit over the rebar and my "designer" hose guide was in place. In a little less than an hour I had three custom hose guides completed and installed in my garden.

Note: You might also want to check out my flower pot umbrella stand and copper pipe garden trellis projects.

© 2012 Jeff Fisher LogoMotives

Toot! Toot!*: 'iheartlogos' second volume gives logo love to Jeff Fisher LogoMotives identity design

The newly released book iheartlogos season two includes the work of Jeff Fisher, the Engineer of Creative Identity for the Portland-based firm Jeff Fisher LogoMotives.. The inspiration-filled volume, published through the iheartlogos website, features 450 logos created by 170 designers from 31 countries around the world.

The Jeff Fisher LogoMotives design included (above) is a pro-bono effort for the Historic Kenton Firehouse Committee, representing the group maintaining and operating the landmark community space in the designer's own North Portland neighborhood. The identity was also short-listed in the Russian design competition Identity: Best of the Best 2010, and appears in the books Logo Nest 01 (Australia) and Logo Design Vol. 3 (Germany).

Identities included in the book were judged and voted on by other designers submitting logos, and individuals registered to vote, at the website iheartlogos.com. The limited edition book is currently available exclusively on the site, for $25 - which includes free shipping in the continental United States. Season three of the iheartlogos competition is currently underway.

Fisher, a 35 year design industry veteran, is the author of Identity Crisis!: 50 redesigns that transformed stale identities into successful brands and The Savvy Designer's Guide to Success: Ideas and tactics for a killer career. Other book projects are currently in the works.

The designer has received over 600 design awards and his work has been published in more than 160 books on identity design, self-promotion and the marketing of small businesses. He often travels – nationally and internationally – to present courses, seminars and workshops on design, branding, marketing and social networking. In addition, Fisher is a nationally-recognized speaker, making numerous presentations each year to design organizations, design schools, universities and business groups.

More information about Jeff Fisher, and his design and writing efforts, may be found on the Jeff Fisher LogoMotives blogfolio.

(* If I don’t "toot!" my own horn, no one else will.)

© 2012 Jeff Fisher LogoMotives

How does the garden grow?: The challenge of replacing my winter-damaged ceramic planters

Several years ago, in a search to find planters for the front porch of my home, my friend Mike Smith - co-owner of Joy Creek Nursery - took me to a garden pottery wholesaler. I was thrilled to find three large ceramic pots that perfectly matched the purple of the front door (below). Over the next few summers the planters were filled with purple fountain grass, purple and green sweet potato vines, pansies and more. During the winter months the vessels were often planted with a variety of kale.

Following the cold and icy winter of 2009, I noticed fine cracks beginning to appear in the surface of the pots. A few small pieces of the purple finish even began to fall off. Fortunately, the seasonal vegetation in the planters covered the increasing flaws.

This past winter the planters began to fail even more. Large portions of the finish began to fall away from the pots after another unusually cold winter (above). The search for replacements began.

With friends and neighbors complaining about winter damage to their own planters, I started looking for substitutes that might better handle the elements. I must have looked at every fiberglass, resin and concrete planter made on websites, at home improvement stores and at nurseries. Most were fake in appearance, too shiny, poorly designed or just plain ugly.

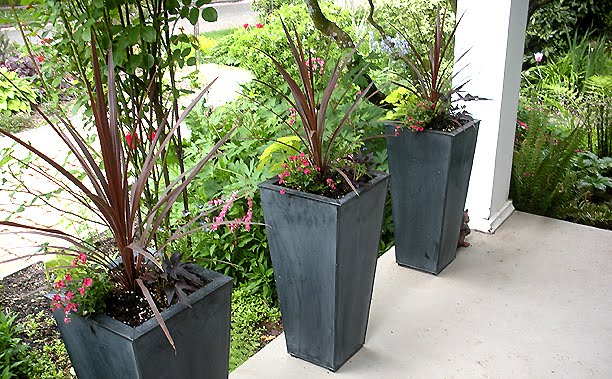
The arrival of my Crate & Barrel catalog resulted in a couple of possible solutions. One, a bronze option, came with the disclaimer "bring indoors during freezing temperatures." Right - I don't think so. The other was a bit more intriguing to me - a tall, square zinc planter with a shallow insert for plantings.

After a visit to the local Crate & Barrel, three of the planters appeared on the porch (above). Ed, my partner of over two decades, suggested feeding drip line sprinkler lines up through the drainage holes in the pots and inserts. I then smashed the old, purple ceramic pots with a hammer; using the pieces to weight down the bottom portions of my new porch decor. After doing so, I had to go plant shopping.

Most of what I planted in the pots came from another favorite local nursery - Marbott's. Spiky Cordyline australis is the centerpiece of each planter. They are surrounded by Blackie sweet potato vine, Blue Picotte Lobelia, the almost chartreuse Marguerite sweet potato vine and Antique Red Diascia. I look forward to the pots filling in as spring progresses - and seeing how the planters survive the changing seasons.

Note: You might want to check out my flower pot umbrella stand, hose guide and copper pipe garden trellis projects. I also have a regularly updated Flickr photo gallery of images from my garden

© 2011 Jeff Fisher LogoMotives

Jeff Fisher's neighborhood logo design efforts recognized at 'Celebrate North Portland' event

It's always nice to be recognized for one's work-related efforts, especially pro-bono activities in your own community - although it's never something to be expected. For me, the funny thing is that each time I've informed that I was to be publicly recognized at a neighborhood event, I've known I would miss the celebration due to traveling outside of the country. Such was the case in March 2011, while I was in on the island of St. Croix.

In late 2010, I learned that my volunteer neighborhood design efforts were to be acknowledged at a public dinner to be held on March 19th at the University of Portland. I was to be one of many residents to be honored at the event "Celebrate North Portland: Recognizing over three decades of activism in North Portland," hosted by my long-time friend and client, Mike Verbout.

Verbout, the former principal of James John School, also asked if I would create the logo to identify the dinner.

Schnitzer Steel, community activists Barbara Parmelee and Rich Recker, former Portland Mayor Vera Katz, columnist Steve Duin of The Oregonian and The Merck Family received plaques for their contributions to North Portland. Along with many businesses, organizations and individuals, I was honored to have a narrative describing my community work published in the evening's recognition book:

"Jeff Fisher, author of Identity Crisis!: 50 redesigns that transformed stale identities into successful brands (HOW Books, 2007), is the Engineer of Creative Identity for the North Portland-based firm Jeff Fisher LogoMotives. A 32-year graphic design veteran, he has been honored with over 600 regional, national and international design awards and is featured in over 140 books about logos, the design business, and small business marketing. His first book, The Savvy Designer's Guide to Success was released in 2004. Other book projects are currently in the works. He often travels – nationally and internationally – to present courses, seminars and workshops on design, branding, marketing and social networking.

In addition, Fisher is a nationally-recognized speaker, making numerous presentations each year to design organizations, design schools, universities and business groups. In 2009, Graphic Design USA magazine named Jeff Fisher one of its design industry “People to Watch.” Jeff Fisher LogoMotives is a past recipient of the Spirit of Portsmouth Award, Salvation Army’s North Portland Neighborhood Pride Award and the Portland Area Theatre Alliance B. Joe Medley Volunteer Award. Fisher is also Portland Rose Festival Character Clown Corps member Toots Caboose. Jeff and his partner, Ed Cunningham, have made Arbor Lodge their home for 15 years.

Past North Portland clients of Jeff Fisher LogoMotives have included James John School, Just Out, Peninsula Community Development Corporation, North Bank Cafe, Coyner's Auto Body, Lampros Steel, The Sentinel and DiPrima Dolci. The designer has donated his talents and abilities to create logos and other works for the North Portland Business Association, Project Safe Summer, Portsmouth Neighborhood Association, Peninsula Clean Team, Caring Community of North Portland, Kenton Neighborhood Service Center, Children's Relief Nursery, North Portland Neighborhood Services, St. Johns Window Project, Historic Kenton Firehouse Committee, The Salvation Army’s Moore Street Corps, and the North Portland Pride B.B.Q and Festival. He also designed the St. Johns street banners."

It's been a real pleasure to live and work in North Portland. I look forward to many more years of involvement in the vibrant community I call "home."

© 2011 Jeff Fisher LogoMotives

Simple garden hose guide and plant protector [Redux]

[With spring gardening in full swing, for those not currently under water or still covered with snow, I've had several requests for information about my hose guide project. Here's a "rerun" of the original post. Happy gardening!]

One of my greatest passions, and best forms of therapy, outside of work is my garden. Although the entire garden is most often watered by a timer- operated irrigation and drip system, occasionally there is a need to do extra watering using the garden hose. I always hate to be dragging the hose across the driveway, sidewalk or patio and have it attempt to decapitate plants in the garden.

I've looked at various hose guides at garden stores and I'm just too cheap to pay what is asked. I'd heard of people making the guides using lengths of pipe with ornamental lamp finials on top. Again, most lamp finials I like are too expensive for me to use in such a manner. A few weeks ago at Lowe's I found some aged bronze swirl drawer pulls on sale for $1.28 a piece - and I'd discovered my hose guide ornaments. So, with a 37-cent copper cap, a $1.42 piece of rebar, and about $1.00 worth of copper pipe, I had my hose guide materials for just over $4.00.

The materials needed for one hose guard (shown above) are:

• 1 piece of 1/2 inch copper pipe cut to 10 inches in length

• 1 copper cap for 1/2 inch pipe

• 1 piece of 3/8 inch rebar cut to 24 inches in length

• 1 ornamental brass or bronze drawer pull

• 1 metal screw (comes with drawer pull)

The tools needed include:

• a tape measure

• a handheld pipe cutter (available at the hardware store)

• a hacksaw (to cut the rebar and screw)

• an electric drill

• the necessary solder and soldering equipment

• steel wool, sandpaper or a tool made for roughing up the pipe surfaces to be joined

• a container of flux and the necessary brush for "painting" it on the copper tubing

• a pair of gloves with a non-skid palm surface for assistance in holding the pipe while it is being cut

The project process was actually fairly simple. The most effort was required in cutting the rebar and copper pipe to the proper lengths. It was also necessary to cut the screw that came with the drawer pull to about half of its length.

I used an electric drill to create a hole in the copper cap to screw on the drawer pull. Once the drawer pull was tightly screwed onto the cap, Ed soldered the screw in place within the cap to prevent movement (you could super glue the screw in place if desired). He then soldered the copper cap to the 10-inch length of copper pipe (again, you could super glue it on for ease).

I then stuck the piece of rebar into the ground, at the corner of the flower bed, until 10 inches of the rebar was left above the surface. The copper pipe fit over the rebar and my "designer" hose guide was in place. In a little less than an hour I had three custom hose guides completed and installed in my garden.

Note: You might also want to check out my flower pot umbrella stand and copper pipe garden trellis projects.

© 2011 Jeff Fisher LogoMotives

It gets better: A personal perspective

It has been extremely upsetting to learn of the many teen suicides across the country in recent months - especially those driven to taking their own lives by bullies taunting the young people for being gay, or just presuming them to be gay. The words or actions of bullies can be extremely nasty weapons.

Photo by Daniel Macías, Lanterna Photography © 2010

In recent weeks many men and women have joined in the YouTube It Gets Better Project campaign initiated by writer and activist Dan Savage - someone I met when I lived in Seattle years ago. I initially considered making my own video. However, surprised by the emotions brought up by memories of childhood bullying, I've opted to make my feelings known in writing.

I was bullied a great deal as a kid in grade school. A skinny, gangly, bookish, uncoordinated and sensitive boy, I was about as non-athletic as anyone could be. I was that kid always picked last to be on any team. It seemed to be even worse that I was artistic. The combination of traits led to me often being called a sissy, fag, queer, homo and other demeaning or derogatory terms. Initially, I didn't even know what most of the words meant, but the manner in which they were delivered made the names incredibly hurtful. Occasionally the actions of bullies turned physical in the form of playground fights and once in a while I'd even get in a good return punch or two. Most often I just walked, or ran, away from the confrontation, feeling kind of worthless.

My parents knew little of what was going on in school. I never told them. I had great allies in a few good friends and my sister, who is one year younger. Some amazing teachers either knew or sensed what I was going through and offered valuable support throughout my school years. I found solace and personal pride in writing and artwork. I even won my first art award for a grade school painting.

It gets better.

In junior high school, instead of focusing on the ongoing actions of bullies, I directed my energies to the things I did best: art, writing, biking and even running. I was good at running - away from bullies and perhaps issues in my own life. When I went running or biking I had no cares in the world. No one could hurt me. No one could get to me. I detested P.E. in school, but my track running times caught the attention of the high school cross-county coach. He asked me to tryout for the high school team, but my heart just wasn't in it. Besides, some of my potential teammates were the same guys who continued to refer to me as a sissy, fag, queer and homo.

I was very good when it came to art. People began to take notice of my abilities. My art was shown in exhibitions, won awards and I had the first one-man shows of my work while I was in junior high. I was able to sell my drawings in galleries and at art fairs. My writing skills led to the enjoyable task of writing for the junior high newspaper. Putting my energy into personal passions boosted my confidence and resulted in some degree of respect from a few previous tormentors.

There were still a few bullies making aspects of my life a bit of a hell. I could never understand why these guys found it necessary to go out of their way to be so mean to me, when I had little or no interest in their lives. The continued teasing and taunting had an incredibly negative impact. As a teen I was already going through so much and didn't know how to deal with the name-calling, especially the gay slurs. I wasn't really sure what being gay was, but I knew I didn't want to be whatever it was. In the darkness of night, I would cry myself to sleep and pray that I wasn't gay. I was probably 13 or 14, and beaten up emotionally, when I first contemplated taking my own life; trying to figure out a way that would not leave a mess for someone to clean up after - still trying to be the perfect, tidy, best little boy in the world. Luckily, I never figured out such a method. I also never told anyone of the thoughts I was having.

It gets better.

The transition to a large high school was not easy. There were new bullies to be battled. However, the opportunities to thrive increased as well. I was never going to be a high school athletic star, so I again focused on my strengths and personal interests. There were also attentive friends, teachers and counselors with whom I could confide when problems, or particularly nasty situations, arose.

I became one of the "go to" students whenever art was needed for a school project. My writing again resulted in working on the school newspaper. Activities such as student government provided additional confidence building. In fact, my confidence had increased so much that I was able to personally take on a bully of a different type - a teacher.

An instructor in the art department had created an unpleasant situation. It seemed like a constant battle in attempting to please this individual. When she told me I "wasn't doing my painting right," I decided to stand up for myself. I explained to school administrators that there could not be a "right" and "wrong" in art - and they agreed. I became the first student put on independent study in art; allowing me to explore many art disciplines and begin my path to a life-long career.

The newfound confidence led to many other accomplishments. There were additional art shows and honors. I was named one of two editors of the nationally recognized school paper. At the end of my senior year I was selected "Boy of the Year" and received several college scholarships. Although I was battling some personal inner demons, I was no longer dealing with bullies. In fact, I surprisingly found myself calling some bullies on their shit when they choose to pick on younger students.

It gets better.

College offered incredible opportunities for personal growth and expanding my horizons. Every young adult should have the chance to experience such freedom. The negative aspects of grade school, junior high and parts of high school seemed to have taken place in a previous lifetime. Had I carried out any earlier thoughts of ending my life, I would have never been able to experience the joy I found in studying art, design and journalism in college.

However, I did occasionally struggle with the personal issue of my sexuality - and the taunts of past bullies would resurface. A favorite uncle being banished from the family, for surprisingly asking to bring his same-sex partner to a holiday event, made me realize that I could never travel down the path I seemed to question. Family was much too important to me to risk being an outcast myself.

For many years I lived the life I felt I was expected to live. I would be 29 years old before I could acknowledge, to myself and others, that I was a gay man.

It gets better.

There will always be bullies in life. However, as I learned late in high school, with confidence in yourself and your abilities, you don't have to put up with their crap. You do have the ability to stand up to such individuals, express faith in yourself, make the most of allies, and move your life in the best direction for you as an individual. For me, being different is a positive attribute - not a negative.

My first real job after college was as the art director for a group of medical publications. After an incredible bossed moved on to a better job, a woman was hired to oversee my department. I suspect her own insecurities about her abilities in the position led to her being a bully in dealing with staff. I was having none of it. One day I overheard her yelling at my assistant and actually calling him a "liar." I'd had enough. I walked into her office, literally stuck my finger in her face and said, "We don't talk to people like that around here." I was as stunned as she, but no one should have to put up with what she had been doing for weeks. I then went to my office and wrote my letter of resignation. The company administrators couldn't understand that I had not been offered another job - I simply was not going to work in a situation with such a bully. As I was walking out the door the receptionist said there was a call for me. It was a former client asking if I had time to take on a contract design job for several months.

In 1985, I finally acknowledged I was gay and came out to family, friends and co-workers at the ad agency where I was an art director. For the most part all were very supportive. In my time at the agency I'd heard the owner make a few homophobic remarks to others - bringing back memories of the bullies of my youth. Although not surprised by his personal attitude, I was not prepared for him to call me into his office to tell me my services were no longer needed, as he was "taking his business in a different direction." At my farewell party, co-workers told me the agency principal was taking his company in a "straighter direction" and was "uncomfortable having a gay man in the office." I'd lost my job because I was gay. I was stunned, but vowed to never again allow myself to be put in such a situation.

A Flickr gallery of images from the 20 year relationship of Jeff and Ed

I opted to simply be honest and open about the fact I was gay. Never again would I allow someone else, especially bullies, to use my sexuality or their hateful homophobic words against me. Pro bono work for AIDS organizations, and causes supportive of gays and lesbians, lead to a great deal of design work for businesses and groups in the LGBT community.

My gay-themed work was displayed proudly in my portfolio of work. If someone choose to not work with me because I was gay, that was just fine with me. I most likely would not want to work with them either. The positive impact of my personal stand was amazing. Potential clients often contacted me specifically because I was gay, or had done work for gay organizations. Often those contacting me would mention that they had a gay son, daughter, sibling, grandchild or friend. Over the years, I received many emails from gay teens around the country; pleased to learn they were not alone in their hopes for a successful business life while being openly gay.

Such design efforts lead to being asked to serve on the founding board of a local organization for businesses owned by gays, lesbians and supportive individuals. With the anti-gay Oregon Ballot Measure 9 campaign in full swing, I agreed to be the public face for gay and lesbian business owners in a Portland television station interview. And then came the death threat voice mails on my answering machine. Bullies again.

These bullies were taken a bit more seriously than those of the past. Pleased that I already lived in a security loft building, police officers suggested that I not walk anywhere by myself. Friends, neighbors and clients expressed their concern and support. Luckily, in the volatile political climate of the time, I was not the victim of greater anger, hatred and violence as experienced by some others in the state. Still, I did not live my life in a fear defined by bullies. The bullies did not win.

It DOES get better.

Today, I have an incredible life. After 32 years, my design career continues to be a successful and wonderful ride. I've received a ridiculous number of awards - many for gay-themed work - and my designs appear in over 140 books. I've written many articles for design publications. In the last six years a book I wrote about having a career in graphic design and another about identity and branding have been published. A third is in progress, with more in the planning stages. Each year I speak about design, marketing and social networking to design school, high school, university and business organization audiences around the country. I even taught a week-long class at a design and innovation college in Mexico this past summer.

Most importantly, I have an incredible personal life. My partner, Ed Cunningham, and I have been together for 20 years. In 2004 we were married during a time when it was possible to do so in Portland. After the marriage was annulled by the courts, we pressed forward and became official domestic partners. We are whole-heartedly supported by a number of family members, amazing friends, co-workers, my clients and industry peers, and a great "family of choice." Being gay is not our entire life; but rather one aspect of well-rounded lives.

Make it better.

Do not let bullies define or control your life. If you are being bullied, find the courage to inform a trusted parent, classmate, family friend, school counselor or teacher - especially if you are having thoughts of harming yourself in any manner. Bullying cannot be tolerated. The problem is the bully - not you.

Be proud of your talents, skills and passions. Focus your energies on the things you do the best and enjoy the most. By doing so you will surround yourself with similar, and supportive, individuals.

Make use of the limitless resources available. Participate in the gay/straight alliance at your school - or start your own organization. Get involved in the community center in your own town, such as Portland's Q Center. Many LGBT newspapers, like Just Out in Oregon, have great directories of local resources and events. Valuable resources on a national level include The Trevor Project and GLAAD, and many others.

Create your own support system. If you are turned away by friends or families, form your own "family of choice" made up of friends, co-workers, neighbors, and family who do offer love and support with no conditions.

You are not alone. Help is available at every turn - just for the asking. Be proud of yourself and all that is combined to make you a unique individual. You do deserve to have a wonderful life.

By taking control of your life and destiny, you are making sure that those who bully do not win.

I've rambled enough...all I really wanted to say was: It gets MUCH better.

© 2010 Jeff Fisher LogoMotives

St. Johns banners finally see the light of day

I've always enjoyed creating designs for businesses, nonprofit organizations and events in my own North Portland neighborhood. Back in early 2002 I designed a series of banners for the volunteer organization Destination St. Johns. The banners were to be displayed on utility poles in the business district of St. Johns, less than a five minute drive from my home studio.

And then nothing happened with the designs and the banners never appeared in public.

In an October 2009 article in the late, great neighborhood newspaper The Sentinel (a past identity design client of mine), Meg Farra, one of the founders of Destination St. Johns, explained, “It was a group we put together to do some projects within St. Johns. For example, we planted native plants in the tree wells through downtown and organized some cleanups before the parade for a few years."

As reported in The Sentinel, "The group decided to create banners for downtown and applied for a grant from the North Portland Trust Fund [the Portland International Raceway noise mitigation funded.] They received $4000 along with support and in-kind donations from many businesses and other groups in St. Johns and North Portland."

I didn't realize that the banners had ever been produced - but instead of adding high-flying color over downtown St. Johns, the banners and all hardware were stored in the basement of the historic Kenton Firehouse.

According to The Sentinel: "...the set of 20 or so vinyl banners were never hung due to political squabbling and the high cost of insurance."

"When the banners were ready to hang, bureaucratic difficulties and a policy change at Portland General Electric entered the game. Partway through negotiations about the banners, PGE changed its insurance requirements. Instead of $1 million, groups now had to carry $2 million in insurance before PGE would allow them to use its poles. PGE also asked Destination St. Johns to coordinate with the St. Johns Boosters, who had a long-standing arrangement with PGE to use certain light poles at Christmastime. A rift developed between some of the leaders involved and for over a year the groups were unable to negotiate a compromise.

"At that point, according to Tom Griffin-Valade of the Office of Neighborhood Involvement, the banners were rolled up and stored in the basement of the Office of Neighborhood Involvement at the Kenton Firehouse. Seven years passed."

The mystery of the missing banners had always intrigued Sentinel publisher Cornelius Swart. With a little detective work, he learned that the banners were in the Kenton Firehouse all along. Swart presented the banners to members of the St. Johns Neighborhood Association in May 2009. At the time of the October 2009 Sentinel article, efforts to hang the banners were being driven by members of the St. Johns Boosters and the St Johns Main Street Coalition, which have representatives from both neighborhood associations, businesses, and individual residents.

I'm not sure what transpired over the past year in regards to insurance issues and neighborhood politics. However, My partner Ed and I recently decided to make a Saturday morning visit to the St. Johns Farmer's Market - and were very surprised to see the banners lining the streets and the farmer's market venue, St. Johns Plaza.

On a recent sunny afternoon, I went to St. Johns to photograph the banners in place (above). I popped into St. Johns Booksellers, the location of my 2007 book signing for Identity Crisis!, to say "hi" to co-owner Nena Rawdah and explain why I was wandering the business district with my camera. She told me that upon learning that the banners were actually going to be installed, she requested a red and yellow one for installation in front of her store (above center).

"I didn't know who was responsible for the design of the banners," added Nena, "but, I'm certainly not surprised."

© 2010 Jeff Fisher LogoMotives.

Logodotes: North Bank Cafe

[Over the 30+ years I've worked professionally as a designer, interesting side stories have come up about my identity designs. This is one of an ongoing series of "Logodotes" - anecdotes about my logo designs.]

In the summer of 2009, I was very sad to learn of the passing of one of my favorite, and most fun, clients. Cecilia Murphy was one-of-a-kind and a Portland institution. It made me smile when, in doing one of the newspaper's "Life Story" features, The Oregonian began the article with "Cecilia Murphy lived by the unofficial motto "'more is more.' Less was not for her."

In that same newspaper article was the minor mention "She had a short-lived coffee shop." That's how I met the vibrant force known as Cecilia Murphy.

In late 2003, Murphy contacted me to assist in helping brand her latest venture - a coffee house and cafe in the St. Johns neighborhood of North Portland. She conveyed a desire to have the business project an image of the television show Northern Exposure meeting North Portland. Some Victorian elements were to be mixed with comfortable over-stuffed furniture and a few rustic Northwest touches - including vintage mounted heads of hunted wildlife.

Her eyes twinkled as she suggested that the cafe identity might included the image of a winking moose, with long eye-lashes and a "big rack." I knew that Murphy meant antlers in this case, but her smile told me she knew exactly what she had said. Throughout our conversation the moose was referred to as "she."

After thinking about the input for a moment, I told my client that I didn't think a female moose would have antlers. Murphy quickly replied, "Well, I guess we'll have a cross-dressing moose."

I appreciated the opportunity to be totally playful with the North Bank Cafe logo project. The moose image quickly developed as a fairly cartoon-ish creature. I researched moose hoof prints, to be used as bullets in the design, and had fun playing with type possibilities, prior to settling on Horndon as my favorite primary font for my initial design concept. Still, second-guessing myself, I was a bit unsure about having possibly taken the beast too far. I included one more conservative concept in the rough designs I presented (above left).

As is the case in 85-90% of my identity design projects, the client was immediately drawn to my very first concept. With a little fine-tuning it became the final logo for the North Bank Cafe (above right).

The North Bank Cafe was short-lived. Unfortunately, Cecilia Murphy is also no longer with us. I am happy that the cross-dressing moose of the logo does live on. It appears in the books Logo Design for Small Business 2, 1000 Restaurant Bar & Cafe Graphics (and its recently-released paperback mini edition) and 100's Visual Logos and Letterheads.

© 2010 Jeff Fisher LogoMotives

Garden umbrella takes a stand - in flower pot [Redux]

[One of my most popular bLog-oMotives entries the past two summer did not feature a graphic design topic. Instead it involved a garden design project. At the time, my instructions for a flower pot patio umbrella stand ended up on the homepage of Apartment Therapy. Then it was mentioned on the blog Life on the Balcony, resulting in a lot of traffic coming my way. Google searches are now bringing a lot of readers to my instructions for this project. I've also had several email requests for the information - so, here it is again.]

My increasingly gorgeous North Portland garden does need some urgent care this week. Things are growing out of control and I hope to take advantage of some "garden therapy" several times in the next few days. Funny, since LeAnn Locher wrote about my garden in Just Out this past month, quite a few people have been inviting themselves over for viewings. (LeAnn recently posted some additional photos on her Flickr page.) We've also been enjoying numerous dinners with friends out on the backyard patio.

Until quite recently I had paid little attention to the tumbled paver patio in front of the house. Initially created to eliminate the last patch of lawn in our garden, the patio had remained empty for almost a year. One of the ideal aspects of the patio space is that it is completely private from the street due to the growth of the plantings behind a curved retaining wall. In fact, walkers passing by on the sidewalk below, while commenting on the garden, most often are unaware I am up on the higher portion of the front yard.

I knew I wanted a couple somewhat traditional Adirondack chairs and a small table for the outdoor room. I also felt a garden umbrella was needed to shade the seating area in the mid-afternoon when hot, direct sunlight was a factor. Still, I didn't want your average, clunky umbrella stand in my front patio decor. When I came across some large pottery flower pots I knew I had my umbrella stand solution - I just needed to wait for the pots to go on sale. I couldn't possibly pay retail. I hate to pay retail.

A couple weeks later the pot I had my eye on went on clearance - and I had an additional 20% off coupon. My umbrella stand project could begin.

The materials needed for one flower pot umbrella stand (shown above right) are:

• 1 large, heavy flower pot - a minimum of 18" to 24" tall

• 1 piece of 2 inch PVC plumbing pipe - cut 2 inches shorter than the depth of the flower pot

• 1 metal plumbing flange to fit 2 inch pipe

• 1 transitional "screw-on thingy" to add to the flange allowing for the PVC pipe to fit into flange

• Rocks, gravel or crushed concrete - enough to fill flower pot to about 6 inches below lip of pot

• Potted annuals or perennials in 6 inch pots - enough to circle around top of large flower pot

• Metal peg or nail (optional)

The tools needed include:

• a tape measure

• a hacksaw (to cut the PVD pipe)

• an electric drill (optional)

Measure the depth of the large flower pot and subtract two inches. This will give you the length needed to cut the PVC pipe with the hacksaw. Screw the transitional "thingy" onto the flange, place the PVC pipe into the transitional "thingy" and place the combined pieces into the large flower pot (as shown above in the second panel from the left)

(As an optional step, I then measured 2 inches down from what would be the top of the exposed pipe and drilled a hole through both sides of the pipe. I placed the umbrella pole into the pipe, marked the location of the holes in the pipe and drilled a hole of the same size through the umbrella pole. This will allow me to slip a metal peg, or large nail, through the pipe and pole to prevent the umbrella from possibly taking flight in a strong wind.)

I then began to fill the flower pot with some crushed concrete - remnants of our past deck backyard deck project. With about 4-5 inches of concrete in the pot I repositioned the pipe/flange contraption so it was centered (above, center photo). I then continued to fill the pot with crushed concrete until I had reached a level about 6 inches from the lip of the flower pot. (above, second photo from right).

After leveling out the crushed concrete in the flower pot I placed seven 6 inch pots of flowers and vegetation in the large flower part and around the pole (above, far right). My flowering garden umbrella stand was complete. All I had to do was place the umbrella in the stand and arrange the rest of my garden furniture (below).

I purchased the Adirondack chairs, small table and umbrella on clearance, with a 10% off total purchase coupon from Cost Plus World Market. All the plumbing pieces used to make the stand came from a nearby Lowe's, but could probably be found at any hardware store. The large flower pot, as well as the smaller one and all the plants, were purchased on clearance - with additional coupon discounts - at a neighborhood store. My entire new patio decor project cost me just under $300.

I have enjoyed sitting out on the patio, working on my PowerBook, listening to the garden critiques from unsuspecting passersby.

Note: You might also want to check out my copper and bronze hose guard and copper pipe garden trellis projects.

© 2010 Jeff Fisher LogoMotives

Jeff Fisher and Ed Cunningham reflect on invalidated 2004 Oregon marriage in id Magazine issue

In early 2004, Multnomah County commissioners authorized the issuing of marriage licenses for same-sex couples in the Portland metropolitan area. On March 7th of that year, my partner of 14 years, Ed Cunningham, and I were married in front of about 60 friends and family on the stage of Theater! Theatre!. Publisher/editor (and personal friend) Christian Messer recently had us take a look back at that time in an interview for the "Gay Marriage...Where Oregon is Headed" issue of his publication id Magazine.

The article allowed us to reflect on the excitement, joy and disappointments of our wedding day during a historic time in Oregon. The issuing of same-sex marriage licenses in Multnomah County began a political battle over the issue that resulted later that year in an amendment to the Oregon Constitution defining marriage. Then, on April 14, 2005, the Oregon State Supreme Court ruled that all such licenses were void from their inception, and the court further ruled that the Oregon Constitution now expressly limits marriage to opposite-sex couples. The political and legal struggle for marriage equality in Oregon continues.

Oregon Governor Ted Kulongoski signed a domestic partnership bill into law on May 9, 2007. Called the Oregon Family Fairness Act, the law would provide several major rights to same-sex couples that were previously only given to married couples, including the ability to file jointly on insurance forms, hospital visitation rights, and rights relating to the deceased partner. While January 1, 2008 was the date the statute would have taken effect, a court challenge delayed its implementation until being resolved on February 1, 2008, and the law went into effect that day, with registrations beginning on February 4, 2008.*

Soon afterwards Ed and I finally became legal domestic partners, recognized by the State of Oregon. However, our domestic partnership had already been registered with Portland and Multnomah County since 2000. As I mentioned to Christian Messer, while being interviewed for the id Magazine piece, by the time the same-sex marriage issue is finally resolved in Oregon we will be able to wallpaper a room with license and registration certificates related to our relationship.

Ed and I will celebrate 20 years together in May of this year.

id Magazine is a monthly publication for the LGBTIQ community of Portland and Oregon. It is distributed online and in print.

*Reference: Wikipedia

© 2010 Jeff Fisher Logomotives

Identity design by Jeff Fisher LogoMotives
included in new 'Retro Style Graphics' book

A logo design by Jeff Fisher, the Engineer of Creative Identity for the Portland-based firm Jeff Fisher Logomotives, is featured in the recently released book Retro Style Graphics. Written by designer and blogger Grant Friedman, the volume was published by Angela Patchell Books.

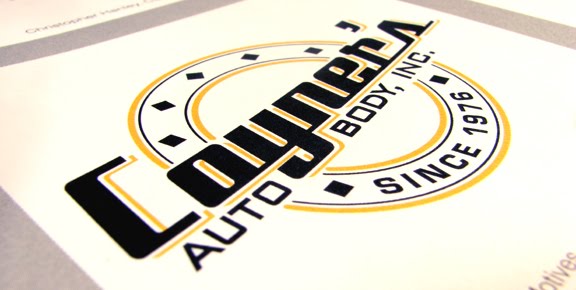
Fisher's logo design for the North Portland business Coyner's Auto Body (above) is showcased as an inspiration example in Retro Style Graphics. Coyner’s had been in business for 30 years without an identity. A long history in the business of passenger and race car repair conjured up an image of the nameplates, with connecting letterforms, on automobiles from the 1950’s through 1970’s. The House Industries font Bullet was the solution to creating a "retro" look in the design. The Coyner's logo also appears in the Spanish book Logos from North to South America.

The term "retro" is often used to describe trends in fashion, design, or architecture. It typically describes any item that was inspired by something from the past. Retro Style Graphics looks to the 1960s, 1970s, and 1980s for inspiration and contains all of the elements a modern designer would need to create graphics in the retro style. The book is a style guide that also includes a comprehensive collection of graphics, textures, patterns, fonts, colors, Illustrator/Photoshop brushes, and a design gallery for inspiration.

"This book has it all," said author Grant Friedman, "I wanted to write a book that gives designers all the tools that they would need to produce graphics in the retro style. As a designer, I understand how much time it can take to research ideas, produce, and then implement a design in a particular style. For this book, I wanted to produce resources that would save my readers time while also ensuring that my readers could maintain full creative control over their projects."

Many in the the international design community, especially online, know author Friedman as the founder of the Colorburned.com, a popular destination for design resources, inspiration and information.

Photos courtesy of author Grant Friedman.

© 2009 Jeff Fisher Logomotives

How does my garden grow?

After the snow and ice of late 2008, and early this year, there wasn't much vegetation left in my backyard garden (Photo top: February 2009). I wasn't sure what would actually survive from the unusually extreme Portland winter weather.

With summer in full swing, my garden has recovered nicely. I did lose some of my favorite plants to the storms. However, most of the garden has come back very strong (Photo bottom: July 2009).

For a look at the evolution of my garden since the earlier snow storms, check out the Flickr gallery of 2009 garden photos.

© 2009 Jeff Fisher LogoMotives

Toot! Toot!*: Author Jeff Fisher cited as "marketing makeover" expert in Entrepreneur Magazine

Jeff Fisher, the Engineer of Creative Identity for the Portland-based design firm Jeff Fisher LogoMotives, is featured as an expert on design and branding in the February 2009 issue of Entrepreneur Magazine. Fisher, author of the book Identity Crisis!: 50 Redesigns That Transformed Stale Identities into Successful Brands, was asked by writer Gwen Moran to critiqued several marketing element redesigns for the article Five Great - and necessary - Marketing Makeovers.

Joining the internationally recognized identity designer in commenting on the highlighted redesign projects are branding consultant and author Karen Post, the Branding Diva from Tampa, FL; and Lynette Xanders, the founder of Portland branding and research firm Wild Alchemy.

The expert panel reviewed the retail store makeover of Philadelphia shoe seller Ubiq; the collateral redesign for Patriot Consulting, Inc. of Iselin, NJ; and the new identity for Portland's Jive Software. The website makeover for CoffeeCakes.com, of Castle Rock, CO, and the new packaging for the Phoenix-based Fairytale Brownies were also critiqued.

Jeff Fisher has received over 600 regional, national and international graphic design awards for his logo and corporate identity efforts and his work is featured in more than over 100 books on the design of logos, the business of graphic design, and small business marketing. His first HOW Books offering, The Savvy Designer’s Guide to Success, appeared on bookstore shelves in late 2004, and was recently re-released in PDF format on CD. Fisher is currently writing a book about typography in identity design. In 2008, Jeff Fisher LogoMotives was recognized as one of the top 100 U.S. home-based businesses by the web presence StartupNation

More information about Jeff Fisher, and his design and writing efforts, may be found on the Jeff Fisher LogoMotives blogfolio.

(* If I don’t "toot!" my own horn, no one else will.)

© 2009 Jeff Fisher LogoMotives

How my garden does grow

Yesterday I spent some time getting some garden therapy. Over the course of the summer plants throughout my garden have grown like crazy. I think I'll need a machete when it comes to cutting some things back in preparation for winter.

Back in mid-April I posted a bLog-oMotives entry about the little two hour gardening project that came about as a result of deciding not to spend $1000 on a water feature in one flower bed. (Top photo: April; lower photo: September) In fact, I spent no money at all in landscaping the area. All the materials used in the bed were either moved from other overcrowded parts of my garden, or the result of dividing some larger plants. With the initial planting things looked a bit bare. I knew that would change in a relatively short period of time.

Several hostas, a sedum and fuschias quickly filled in much of the bed. (Left photo: April; right photo: September) Black mondo grass, a black fern, a saxifraga, a Veronica ground-cover, an ornamental thistle, some calla lilies and moss roses added color, texture and variety. Then the begonia that wants to eat North Portland filled in any bare space.

The only disappointment in the bed is a supposedly hardy gardenia. Of the five originally placed in my garden two are thriving (one is in its second year), two appear to be diseased (including the one in my newest bed) and one did not survive.

In the two inner patio corners of the bed are my homemade copper hose guides. I wrote a "how-to" bLog-oMotives entry about the hose guides back in June.

It was a beautiful fall day to be out gardening. I even began the process of raking leaves that had fallen from our pink dogwood. Suddenly, I was attacked and covered by a swarm of yellowjackets. I was doing a far from graceful "get naked" dance as I ran to the house, tearing off my insect covered clothing. By the time I got into the kitchen I was just wearing my briefs and still had yellowjackets in my hair and flying around me. Somehow I got only three stings - one in my ear, one behind my knee and one on my shin. I did have a minor immediate allergic reaction, but soon felt nothing but intense pain in my swelling ear.

Later in the evening we discovered that the yellowjackets had built a nest in the drainage hole of half a wine barrel planted with mint for our mojito-making. Ed stuck a cork in the opening and proceeded to flood out the nest throughout this morning.

I hope that with continuing great fall weather I will be able to enjoy additional days of garden therapy without requiring any medical attention, allergy drugs or painkillers.

©2008 Jeff Fisher LogoMotives

Apartment Therapy flowers praise on umbrella stand

The site Apartment Therapy has taken notice of my recent bLog-oMotives piece about making the umbrella stand for my garden. They've posted their own entry How To: Make a Flowering Outdoor Umbrella Stand. Thanks!

© 2008 Jeff Fisher LogoMotives

A garden umbrella takes a stand - in a flower pot

My increasingly gorgeous North Portland garden does need some urgent care this week. Things are growing out of control and I hope to take advantage of some "garden therapy" several times in the next few days. Funny, since LeAnn Locher wrote about my garden in Just Out this past month, quite a few people have been inviting themselves over for viewings. (LeAnn recently posted some additional photos on her Flickr page.) We've also been enjoying numerous dinners with friends out on the backyard patio.

Until quite recently I had paid little attention to the tumbled paver patio in front of the house. Initially created to eliminate the last patch of lawn in our garden, the patio had remained empty for almost a year. One of the ideal aspects of the patio space is that it is completely private from the street due to the growth of the plantings behind a curved retaining wall. In fact, walkers passing by on the sidewalk below, while commenting on the garden, most often are unaware I am up on the higher portion of the front yard.

I knew I wanted a couple somewhat traditional Adirondack chairs and a small table for the outdoor room. I also felt a garden umbrella was needed to shade the seating area in the mid-afternoon when hot, direct sunlight was a factor. Still, I didn't want your average, clunky umbrella stand in my front patio decor. When I came across some large pottery flower pots I knew I had my umbrella stand solution - I just needed to wait for the pots to go on sale. I couldn't possibly pay retail. I hate to pay retail.

A couple weeks later the pot I had my eye on went on clearance - and I had an additional 20% off coupon. My umbrella stand project could begin.

The materials needed for one flower pot umbrella stand (shown above right) are:

• 1 large, heavy flower pot - a minimum of 18" to 24" tall

• 1 piece of 2 inch PVC plumbing pipe - cut 2 inches shorter than the depth of the flower pot

• 1 metal plumbing flange to fit 2 inch pipe

• 1 transitional "screw-on thingy" to add to the flange allowing for the PVC pipe to fit into flange

• Rocks, gravel or crushed concrete - enough to fill flower pot to about 6 inches below lip of pot

• Potted annuals or perennials in 6 inch pots - enough to circle around top of large flower pot

• Metal peg or nail (optional)

The tools needed include:

• a tape measure

• a hacksaw (to cut the PVD pipe)

• an electric drill (optional)

Measure the depth of the large flower pot and subtract two inches. This will give you the length needed to cut the PVC pipe with the hacksaw. Screw the transitional "thingy" onto the flange, place the PVC pipe into the transitional "thingy" and place the combined pieces into the large flower pot (as shown above in the second panel from the left)

(As an optional step, I then measured 2 inches down from what would be the top of the exposed pipe and drilled a hole through both sides of the pipe. I placed the umbrella pole into the pipe, marked the location of the holes in the pipe and drilled a hole of the same size through the umbrella pole. This will allow me to slip a metal peg, or large nail, through the pipe and pole to prevent the umbrella from possibly taking flight in a strong wind.)

I then began to fill the flower pot with some crushed concrete - remnants of our past deck backyard deck project. With about 4-5 inches of concrete in the pot I repositioned the pipe/flange contraption so it was centered (above, center photo). I then continued to fill the pot with crushed concrete until I had reached a level about 6 inches from the lip of the flower pot. (above, second photo from right).

After leveling out the crushed concrete in the flower pot I placed seven 6 inch pots of flowers and vegetation in the large flower part and around the pole (above, far right). My flowering garden umbrella stand was complete. All I had to do was place the umbrella in the stand and arrange the rest of my garden furniture (below).

I purchased the Adirondack chairs, small table and umbrella on clearance, with a 10% off total purchase coupon from Cost Plus World Market. All the plumbing pieces used to make the stand came from a nearby Lowe's, but could probably be found at any hardware store. The large flower pot, as well as the smaller one and all the plants, were purchased on clearance - with additional coupon discounts - at a neighborhood store. My entire new patio decor project cost me just under $300.

I have enjoyed sitting out on the patio, working on my PowerBook, listening to the garden critiques from unsuspecting passersby.

Note: Thanks to Apartment Therapy for featuring this project on their site.

© 2008 Jeff Fisher LogoMotives

Chef Jeff learns to make sushi

Although I do cook quite a bit, my partner Ed Cunningham is the true chef in our household. This week Ed, the business manager for the local office of the law firm Holland & Knight, coordinated the annual summer associates activity in the form of a Japanese-inspired cooking class at In Good Taste in Portland's Pearl District. Attorneys, staff, spouses (that would include me as the "corporate wife") and friends got a hands-on lesson in making sushi.

(From left to right: Law clerk Andy Schlegel, Chef Ivy Manning, yours truly and Andy's wife Kendra preparing sushi at In Good Taste.)

Food writer, cooking instructor and personal chef Ivy Manning prepared a great menu for the evening of Sesame Noodles with Asparagus, Miso Soup, Thai Vegetable Rolls with Spicy Peanut Sauce, California Inside Out Rolls, Spicy Tuna Rolls, Japanese Eggplant with Miso Glaze, and Grilled Fresh Albacore Tuna with Wasabi Mashed Potatoes. Manning demonstrated how to make the sushi and then we divided up into three groups; each given the assignment of making one of the sushi rolls on the menu.

My teammates and I were responsible for making the Thai Vegetable Rolls with Spicy Peanut Sauce. The whole process was surprisingly easy and fun. It's somewhat embarrassing that Ed and I have all the sushi-making tools at home and never used them in the past. Making sushi would be a great excuse to have a participatory dinner party.

Chef Ivy prepared all of the other dishes as she explained the recipes (which we were provided) and offered helpful tips. Throughout the evening we were served a sparkling wine, two white wines and local sake - ingredients that always contribute to a successful cooking event. Following a dessert of raspberry sorbet with fresh fruit, we were all presented the surprise treat of the evening - autographed copies of Ivy Manning's new cookbook, The Farm to Table Cookbook: The Art of Eating Locally.

The evening was an incredibly enjoyable and educational experience for this "corporate wife."

© 2008 Jeff Fisher LogoMotives

'Just Out' in my beautiful North Portland garden

Recently, by way of my Facebook profile, LeAnn Locher kind of invited herself over to my home to take a look at my garden. It's not like I didn't know her - we met briefly several years ago when I was asked to design the logo for the Portsmouth Neighborhood Association and she was present at the selection process meetings. I was looking forward to visiting with her and arranged a date for espresso drinks in my garden.

LeAnn was coming to visit in her capacity as the "Sassy Gardener" columnist for Just Out, the statewide newsmagazine for Oregon's gay, lesbian, bisexual and transgendered communities. Today the article resulting from our afternoon of garden therapy, and glasses of white Italian wine (coffee or wine ended up being the options), was published in the print edition. You will also find "Humor in the Garden" online

The fun LeAnn and I had while discussing my garden on a beautiful sunny afternoon comes through clearly in the piece. The recent addition of my home-made hose guides is mentioned, as are the copper trellises I designed and constructed. My unintentional plastic squirrel collection even gets some press. The article does a great job of conveying my passion for gardening, and how it has become yet another personal creative outlet.

One of the additional benefits of the afternoon was the opportunity to learn more about LeAnn. We have quite a bit in common. She and I are both almost rabid supporters of our North Portland neighborhoods - and she often writes about her home's location, garden and a wide variety of other local topics in her popular blog Lelo in Nopo. In addition to a commonality as writers and gardeners, we are both graphic designers and branding specialists. Her business website exhibits some well-designed logo creations. I'm already looking forward to a future visit to LeAnn's garden to discuss plants, design and the neighborhood.

The publication Just Out and I are not strangers. Over the years I've designed several projects for the paper, including the Just Out identity. Recently I altered that logo a bit to reflect the newsmagazine's 25th anniversary. Back in 2000, Marc Acito wrote an article about my design business for Just Out. In December of this past year the publication also featured my "better half," Ed Cunningham, in an article about the law firm where he is employed. I really appreciate today's article focusing on my gardening.

Update: While I was on vacation LeAnn posted a personal entry and additional photos of our garden on her blog.

© 2008 Jeff Fisher LogoMotives

Distractions in my summer office

On beautiful sunny days I often work from my summer office - the patio table in my backyard garden. Yesterday was gorgeous and - in shorts, a T-shirt, flip-flops and sunglasses - I was working outside on my PowerBook during the morning hours to get out of my cleaning lady's way. Then I got distracted by all around me for a while. Gardening is a passion, my best therapy and a great creative outlet.

The first thing that drew my attention away from work was the sun shining on the white bloom of a leek, with lavender in the background (top image). To check out what else is currently blooming in my garden, visit this image gallery.

© 2008 Jeff Fisher LogoMotives