Showing posts with label Creativity. Show all posts

Simple garden hose guide & plant protector [Redux]

[With hot summer weather causing me to do a little more hand-watering than usual, I've realized that I need to make a few more of my DIY hose guides. Here's a "rerun" of the original post on my past garden project. Happy gardening!]

One of my greatest passions, and best forms of therapy, outside of work is my garden. Although the entire garden is most often watered by a timer- operated irrigation and drip system, occasionally there is a need to do extra watering using the garden hose. I always hate to be dragging the hose across the driveway, sidewalk or patio and have it attempt to decapitate plants in the garden.

I've looked at various hose guides at garden stores and I'm just too cheap to pay what is asked. I'd heard of people making the guides using lengths of pipe with ornamental lamp finials on top. Again, most lamp finials I like are too expensive for me to use in such a manner. A few weeks ago at Lowe's I found some aged bronze swirl drawer pulls on sale for $1.28 a piece - and I'd discovered my hose guide ornaments. So, with a 37-cent copper cap, a $1.42 piece of rebar, and about $1.00 worth of copper pipe, I had my hose guide materials for just over $4.00.

The materials needed for one hose guard (shown above) are:

• 1 piece of 1/2 inch copper pipe cut to 10 inches in length

• 1 copper cap for 1/2 inch pipe

• 1 piece of 3/8 inch rebar cut to 24 inches in length

• 1 ornamental brass or bronze drawer pull

• 1 metal screw (comes with drawer pull)

The tools needed include:

• a tape measure

• a handheld pipe cutter (available at the hardware store)

• a hacksaw (to cut the rebar and screw)

• an electric drill

• the necessary solder and soldering equipment

• steel wool, sandpaper or a tool made for roughing up the pipe surfaces to be joined

• a container of flux and the necessary brush for "painting" it on the copper tubing

• a pair of gloves with a non-skid palm surface for assistance in holding the pipe while it is being cut

The project process was actually fairly simple. The most effort was required in cutting the rebar and copper pipe to the proper lengths. It was also necessary to cut the screw that came with the drawer pull to about half of its length.

I used an electric drill to create a hole in the copper cap to screw on the drawer pull. Once the drawer pull was tightly screwed onto the cap, Ed soldered the screw in place within the cap to prevent movement (you could super glue the screw in place if desired). He then soldered the copper cap to the 10-inch length of copper pipe (again, you could super glue it on for ease).

I then stuck the piece of rebar into the ground, at the corner of the flower bed, until 10 inches of the rebar was left above the surface. The copper pipe fit over the rebar and my "designer" hose guide was in place. In a little less than an hour I had three custom hose guides completed and installed in my garden.

Note: You might also want to check out my flower pot umbrella stand and copper pipe garden trellis projects.

© 2012 Jeff Fisher LogoMotives

Simple garden hose guide and plant protector [Redux]

[With spring gardening in full swing, for those not currently under water or still covered with snow, I've had several requests for information about my hose guide project. Here's a "rerun" of the original post. Happy gardening!]

One of my greatest passions, and best forms of therapy, outside of work is my garden. Although the entire garden is most often watered by a timer- operated irrigation and drip system, occasionally there is a need to do extra watering using the garden hose. I always hate to be dragging the hose across the driveway, sidewalk or patio and have it attempt to decapitate plants in the garden.

I've looked at various hose guides at garden stores and I'm just too cheap to pay what is asked. I'd heard of people making the guides using lengths of pipe with ornamental lamp finials on top. Again, most lamp finials I like are too expensive for me to use in such a manner. A few weeks ago at Lowe's I found some aged bronze swirl drawer pulls on sale for $1.28 a piece - and I'd discovered my hose guide ornaments. So, with a 37-cent copper cap, a $1.42 piece of rebar, and about $1.00 worth of copper pipe, I had my hose guide materials for just over $4.00.

The materials needed for one hose guard (shown above) are:

• 1 piece of 1/2 inch copper pipe cut to 10 inches in length

• 1 copper cap for 1/2 inch pipe

• 1 piece of 3/8 inch rebar cut to 24 inches in length

• 1 ornamental brass or bronze drawer pull

• 1 metal screw (comes with drawer pull)

The tools needed include:

• a tape measure

• a handheld pipe cutter (available at the hardware store)

• a hacksaw (to cut the rebar and screw)

• an electric drill

• the necessary solder and soldering equipment

• steel wool, sandpaper or a tool made for roughing up the pipe surfaces to be joined

• a container of flux and the necessary brush for "painting" it on the copper tubing

• a pair of gloves with a non-skid palm surface for assistance in holding the pipe while it is being cut

The project process was actually fairly simple. The most effort was required in cutting the rebar and copper pipe to the proper lengths. It was also necessary to cut the screw that came with the drawer pull to about half of its length.

I used an electric drill to create a hole in the copper cap to screw on the drawer pull. Once the drawer pull was tightly screwed onto the cap, Ed soldered the screw in place within the cap to prevent movement (you could super glue the screw in place if desired). He then soldered the copper cap to the 10-inch length of copper pipe (again, you could super glue it on for ease).

I then stuck the piece of rebar into the ground, at the corner of the flower bed, until 10 inches of the rebar was left above the surface. The copper pipe fit over the rebar and my "designer" hose guide was in place. In a little less than an hour I had three custom hose guides completed and installed in my garden.

Note: You might also want to check out my flower pot umbrella stand and copper pipe garden trellis projects.

© 2011 Jeff Fisher LogoMotives

Garden umbrella takes a stand - in flower pot [Redux]

[One of my most popular bLog-oMotives entries the past two summer did not feature a graphic design topic. Instead it involved a garden design project. At the time, my instructions for a flower pot patio umbrella stand ended up on the homepage of Apartment Therapy. Then it was mentioned on the blog Life on the Balcony, resulting in a lot of traffic coming my way. Google searches are now bringing a lot of readers to my instructions for this project. I've also had several email requests for the information - so, here it is again.]

My increasingly gorgeous North Portland garden does need some urgent care this week. Things are growing out of control and I hope to take advantage of some "garden therapy" several times in the next few days. Funny, since LeAnn Locher wrote about my garden in Just Out this past month, quite a few people have been inviting themselves over for viewings. (LeAnn recently posted some additional photos on her Flickr page.) We've also been enjoying numerous dinners with friends out on the backyard patio.

Until quite recently I had paid little attention to the tumbled paver patio in front of the house. Initially created to eliminate the last patch of lawn in our garden, the patio had remained empty for almost a year. One of the ideal aspects of the patio space is that it is completely private from the street due to the growth of the plantings behind a curved retaining wall. In fact, walkers passing by on the sidewalk below, while commenting on the garden, most often are unaware I am up on the higher portion of the front yard.

I knew I wanted a couple somewhat traditional Adirondack chairs and a small table for the outdoor room. I also felt a garden umbrella was needed to shade the seating area in the mid-afternoon when hot, direct sunlight was a factor. Still, I didn't want your average, clunky umbrella stand in my front patio decor. When I came across some large pottery flower pots I knew I had my umbrella stand solution - I just needed to wait for the pots to go on sale. I couldn't possibly pay retail. I hate to pay retail.

A couple weeks later the pot I had my eye on went on clearance - and I had an additional 20% off coupon. My umbrella stand project could begin.

The materials needed for one flower pot umbrella stand (shown above right) are:

• 1 large, heavy flower pot - a minimum of 18" to 24" tall

• 1 piece of 2 inch PVC plumbing pipe - cut 2 inches shorter than the depth of the flower pot

• 1 metal plumbing flange to fit 2 inch pipe

• 1 transitional "screw-on thingy" to add to the flange allowing for the PVC pipe to fit into flange

• Rocks, gravel or crushed concrete - enough to fill flower pot to about 6 inches below lip of pot

• Potted annuals or perennials in 6 inch pots - enough to circle around top of large flower pot

• Metal peg or nail (optional)

The tools needed include:

• a tape measure

• a hacksaw (to cut the PVD pipe)

• an electric drill (optional)

Measure the depth of the large flower pot and subtract two inches. This will give you the length needed to cut the PVC pipe with the hacksaw. Screw the transitional "thingy" onto the flange, place the PVC pipe into the transitional "thingy" and place the combined pieces into the large flower pot (as shown above in the second panel from the left)

(As an optional step, I then measured 2 inches down from what would be the top of the exposed pipe and drilled a hole through both sides of the pipe. I placed the umbrella pole into the pipe, marked the location of the holes in the pipe and drilled a hole of the same size through the umbrella pole. This will allow me to slip a metal peg, or large nail, through the pipe and pole to prevent the umbrella from possibly taking flight in a strong wind.)

I then began to fill the flower pot with some crushed concrete - remnants of our past deck backyard deck project. With about 4-5 inches of concrete in the pot I repositioned the pipe/flange contraption so it was centered (above, center photo). I then continued to fill the pot with crushed concrete until I had reached a level about 6 inches from the lip of the flower pot. (above, second photo from right).

After leveling out the crushed concrete in the flower pot I placed seven 6 inch pots of flowers and vegetation in the large flower part and around the pole (above, far right). My flowering garden umbrella stand was complete. All I had to do was place the umbrella in the stand and arrange the rest of my garden furniture (below).

I purchased the Adirondack chairs, small table and umbrella on clearance, with a 10% off total purchase coupon from Cost Plus World Market. All the plumbing pieces used to make the stand came from a nearby Lowe's, but could probably be found at any hardware store. The large flower pot, as well as the smaller one and all the plants, were purchased on clearance - with additional coupon discounts - at a neighborhood store. My entire new patio decor project cost me just under $300.

I have enjoyed sitting out on the patio, working on my PowerBook, listening to the garden critiques from unsuspecting passersby.

Note: You might also want to check out my copper and bronze hose guard and copper pipe garden trellis projects.

© 2010 Jeff Fisher LogoMotives

A simple garden trellis project [Redux]

The renovation of our garden continues. When Joy Creek Nursery had to remove an old rhododendron from what will become an outdoor kitchen area, a beautiful purple clematis lost its natural trellis. The old rhody found a new home out in the Joy Creek gardens, after being the model for a pruning class. The clematis, and several other plants, sat above ground, basically bare root, for a couple months before finding new homes among the revised hardscape.

I couldn't find trellises that I liked for the clematis. Most cost several hundred dollars and had patterns I didn't really want incorporated into our gardenscape. I roughed out a design on my computer for a set of trellises to be made out of copper pipe. My partner, Ed, previously made an arbor in a similar manner several years ago when he was practicing his copper pipe work prior to re-plumbing our home.

The trellises were designed to be approximately five feet wide and stand a total of five feet above the surface of the garden bed.

The materials needed for one trellis are:

• 8 pieces of 1/2 inch copper pipe cut to 24 inch lengths (you will want to use the thickest 1/2 inch pipe for added strength)

• 8 pieces of 1/2 inch copper pipe cut to 20 inch lengths

• 2 pieces of 1/2 inch copper pipe cut to 12 inch lengths

• 2 copper corner joints for 1/2 inch pipe

• 10 copper "tee" joints for 1/2 pipe

• 2 pieces of 3/8 inch rebar cut to 4 foot lengths

• 1 piece 1/4 inch copper tubing 5 feet in length

• 2 small metal screws 1/2 to 5/8 inches in length

The tools needed include:

• a handheld pipe cutter (available at the hardware store)

• the necessary solder and soldering equipment

• steel wool, sandpaper or a tool made for roughing up the pipe surfaces to be joined

• a container of flux and the necessary brush for "painting" it on the copper tubing

• a pair of gloves with a non-skid palm surface for assistance in holding the pipe while it is being cut

I cut all the copper lengths. On the flat surface of my patio, I then prefit all the pieces together to make sure all were correct and my trellis was going to be square. Ed then help me rough up all services that were to be soldered, but flux on both surfaces to be joines and soldered the frame at each joint. (many home improvement websites and books have great detail about the soldering process.)

I then formed the 5 foot length of 1/4 copper tubing into a spiral shape to serve as the centerpiece design element of the trellis. Spirals and swirls are patterns that have been repeated throughout our home in light fixtures, switchplate covers, light fixtures, fabrics, glassware, eating/serving utensils, dishes, interior art, garden art and elsewhere. Where the tubing was to meet the frame, I crimped the tubing flat with plyers and then drilled a hole (just smaller than the selected screws) through the flattened tupping and the "tee" joint where the swirl would be joined to the frame. The swirl was then screwed tightly into place.

Two pieces of rebar were then stuck about 1 foot into the ground at the distance determined by the width of the finished trellis. The finished trellis end pieces, or legs, where then forced over the rebar and pushed down to ground level. The previously homeless clematis was then planted in front of the trellis and I wove the new growth through the copper trellis frame.

The process was then duplicated for a second matching trellis. The plants seem very happy with their new homes - and I have trellises that also serve as garden art. I was thrilled that the finished trellises cost about $50 a piece in materials - due in part to the fact we already had the soldering supplies in our personal tool library - and were only a project of a few hours.

Note: You might also want to check out my copper and bronze hose guard and flower pot patio umbrella stand projects.

© 2010 Jeff Fisher LogoMotives

How does my garden grow?

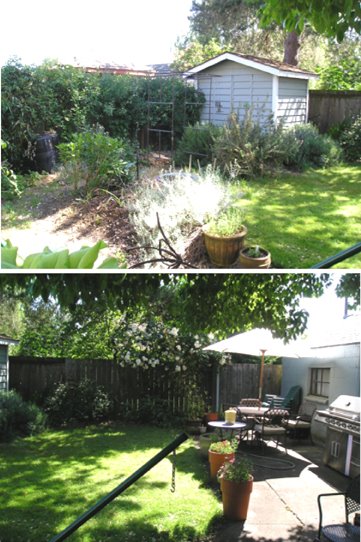
After the snow and ice of late 2008, and early this year, there wasn't much vegetation left in my backyard garden (Photo top: February 2009). I wasn't sure what would actually survive from the unusually extreme Portland winter weather.

With summer in full swing, my garden has recovered nicely. I did lose some of my favorite plants to the storms. However, most of the garden has come back very strong (Photo bottom: July 2009).

For a look at the evolution of my garden since the earlier snow storms, check out the Flickr gallery of 2009 garden photos.

© 2009 Jeff Fisher LogoMotives

Apartment Therapy flowers praise on umbrella stand

The site Apartment Therapy has taken notice of my recent bLog-oMotives piece about making the umbrella stand for my garden. They've posted their own entry How To: Make a Flowering Outdoor Umbrella Stand. Thanks!

© 2008 Jeff Fisher LogoMotives
A garden umbrella takes a stand - in a flower pot

My increasingly gorgeous North Portland garden does need some urgent care this week. Things are growing out of control and I hope to take advantage of some "garden therapy" several times in the next few days. Funny, since LeAnn Locher wrote about my garden in Just Out this past month, quite a few people have been inviting themselves over for viewings. (LeAnn recently posted some additional photos on her Flickr page.) We've also been enjoying numerous dinners with friends out on the backyard patio.

Until quite recently I had paid little attention to the tumbled paver patio in front of the house. Initially created to eliminate the last patch of lawn in our garden, the patio had remained empty for almost a year. One of the ideal aspects of the patio space is that it is completely private from the street due to the growth of the plantings behind a curved retaining wall. In fact, walkers passing by on the sidewalk below, while commenting on the garden, most often are unaware I am up on the higher portion of the front yard.

I knew I wanted a couple somewhat traditional Adirondack chairs and a small table for the outdoor room. I also felt a garden umbrella was needed to shade the seating area in the mid-afternoon when hot, direct sunlight was a factor. Still, I didn't want your average, clunky umbrella stand in my front patio decor. When I came across some large pottery flower pots I knew I had my umbrella stand solution - I just needed to wait for the pots to go on sale. I couldn't possibly pay retail. I hate to pay retail.

A couple weeks later the pot I had my eye on went on clearance - and I had an additional 20% off coupon. My umbrella stand project could begin.

The materials needed for one flower pot umbrella stand (shown above right) are:

• 1 large, heavy flower pot - a minimum of 18" to 24" tall

• 1 piece of 2 inch PVC plumbing pipe - cut 2 inches shorter than the depth of the flower pot

• 1 metal plumbing flange to fit 2 inch pipe

• 1 transitional "screw-on thingy" to add to the flange allowing for the PVC pipe to fit into flange

• Rocks, gravel or crushed concrete - enough to fill flower pot to about 6 inches below lip of pot

• Potted annuals or perennials in 6 inch pots - enough to circle around top of large flower pot

• Metal peg or nail (optional)

The tools needed include:

• a tape measure

• a hacksaw (to cut the PVD pipe)

• an electric drill (optional)

Measure the depth of the large flower pot and subtract two inches. This will give you the length needed to cut the PVC pipe with the hacksaw. Screw the transitional "thingy" onto the flange, place the PVC pipe into the transitional "thingy" and place the combined pieces into the large flower pot (as shown above in the second panel from the left)

(As an optional step, I then measured 2 inches down from what would be the top of the exposed pipe and drilled a hole through both sides of the pipe. I placed the umbrella pole into the pipe, marked the location of the holes in the pipe and drilled a hole of the same size through the umbrella pole. This will allow me to slip a metal peg, or large nail, through the pipe and pole to prevent the umbrella from possibly taking flight in a strong wind.)

I then began to fill the flower pot with some crushed concrete - remnants of our past deck backyard deck project. With about 4-5 inches of concrete in the pot I repositioned the pipe/flange contraption so it was centered (above, center photo). I then continued to fill the pot with crushed concrete until I had reached a level about 6 inches from the lip of the flower pot. (above, second photo from right).

After leveling out the crushed concrete in the flower pot I placed seven 6 inch pots of flowers and vegetation in the large flower part and around the pole (above, far right). My flowering garden umbrella stand was complete. All I had to do was place the umbrella in the stand and arrange the rest of my garden furniture (below).

I purchased the Adirondack chairs, small table and umbrella on clearance, with a 10% off total purchase coupon from Cost Plus World Market. All the plumbing pieces used to make the stand came from a nearby Lowe's, but could probably be found at any hardware store. The large flower pot, as well as the smaller one and all the plants, were purchased on clearance - with additional coupon discounts - at a neighborhood store. My entire new patio decor project cost me just under $300.

I have enjoyed sitting out on the patio, working on my PowerBook, listening to the garden critiques from unsuspecting passersby.

Note: Thanks to Apartment Therapy for featuring this project on their site.

© 2008 Jeff Fisher LogoMotives
A simple garden hose guide and plant protector

One of my greatest passions, and best forms of therapy, outside of work is my garden. Although the entire garden is most often watered by a timer- operated irrigation and drip system, occasionally there is a need to do extra watering using the garden hose. I always hate to be dragging the hose across the driveway, sidewalk or patio and have it attempt to decapitate plants in the garden.

I've looked at various hose guides at garden stores and I'm just too cheap to pay what is asked. I'd heard of people making the guides using lengths of pipe with ornamental lamp finials on top. Again, most lamp finials I like are too expensive for me to use in such a manner. A few weeks ago at Lowe's I found some aged bronze swirl drawer pulls on sale for $1.28 a piece - and I'd discovered my hose guide ornaments. So, with a 37-cent copper cap, a $1.42 piece of rebar, and about $1.00 worth of copper pipe, I had my hose guide materials for just over $4.00.

The materials needed for one hose guard (shown above) are:

• 1 piece of 1/2 inch copper pipe cut to 10 inches in length

• 1 copper cap for 1/2 inch pipe

• 1 piece of 3/8 inch rebar cut to 24 inches in length

• 1 ornamental brass or bronze drawer pull

• 1 metal screw (comes with drawer pull)

The tools needed include:

• a tape measure

• a handheld pipe cutter (available at the hardware store)

• a hacksaw (to cut the rebar and screw)

• an electric drill

• the necessary solder and soldering equipment

• steel wool, sandpaper or a tool made for roughing up the pipe surfaces to be joined

• a container of flux and the necessary brush for "painting" it on the copper tubing

• a pair of gloves with a non-skid palm surface for assistance in holding the pipe while it is being cut

The project process was actually fairly simple. The most effort was required in cutting the rebar and copper pipe to the proper lengths. It was also necessary to cut the screw that came with the drawer pull to about half of its length.

I used an electric drill to create a hole in the copper cap to screw on the drawer pull. Once the drawer pull was tightly screwed onto the cap, Ed soldered the screw in place within the cap to prevent movement (you could super glue the screw in place if desired). He then soldered the copper cap to the 10-inch length of copper pipe (again, you could super glue it on for ease).

I then stuck the piece of rebar into the ground, at the corner of the flower bed, until 10 inches of the rebar was left above the surface. The copper pipe fit over the rebar and my "designer" hose guide was in place. In a little less than an hour I had three custom hose guides completed and installed in my garden.

Note: You might also want to check out my copper garden trellis project.

© 2008 Jeff Fisher LogoMotives
design:related™ features Jeff Fisher

Jeff Fisher, the Engineer of Creative Identity for the Portland-based firm Jeff Fisher LogoMotives, is currently the Featured Designer on the homepage of the creative industry networking site design:related™. A social-based website, design:related™ brings together creative people from different disciplines (and world locations) of the design world. With the integration of portfolios, inspirations, job postings, and community, the site serves to motivate designers to share ideas, inspire, and be inspired.

Designers are able to create a professional and personal profile, upload a project portfolio, post a resume PDF, share inspiration resources, link to news items, create a network of designers, and interact with others through private messages. Employers are also able to create creative industry job postings.

Designers should take the quick tour of the site's capabilities, posted on the homepage, and consider participation in the social and professional network created specifically for creatives.

© 2007 Jeff Fisher LogoMotives
Still time to enter Holli Conger's
First Annual Pumpkin Junkin' Contest

Holli Conger has been one of my favorite illustrators for quite a few years now. I always enjoy getting her emails, as I never know what they may bring. Today I got a reminder message from her about the First Annual Pumpkin Junkin' Exhibit & Contest. The deadline of October 31st is fast approaching. Artists around the world are encouraged to use and abuse a pumpkin with found objects, creating a masterpiece to share in the 2007 Pumpkin Junkin' Gallery. All the rules are on the official site.

Worldwide exposure of your pumpkin creation is not the only benefit of participation. There's a grand prize of one of Holli's great original Junk A Doodles illustration pieces. She's even lined up illustrators Paige Pooler, Robyn Fabsits and Andi Butler as judges.

By the way, be sure to check out Holli's fun illustration work.

© 2007 Jeff Fisher LogoMotives

HOW Forum HOWies create HOWie wowie poster

The HOW Design Forum is one of my favorite online communities. I've been a participant for several incarnations of the cyber forum to date. Those who participate in the daily design networking activities are commonly known as "HOWies." If the name conjurs up a sense of some off-the-wall cult members, it's not far from the truth - the forum is kind of a design cult that sucks you in and will not let you be free to take care of your necessary daily work tasks.

Over the years the online community activity has occasionally strayed into the "real" world. HOWies have congregated at the annual HOW Design Conference (with special custom HOWie attendee I.D. badges), and in more casual gatherings around the country, to form real friendships. In a step beyond the normal forum avatar identitifications, The HOW Forum Member Picture Show A-Rama gave real faces to many of the regular visitors. There's even a HOWie group on Facebook, and a gaggle of HOWies can be found of Flickr and elsewhere on Internet social networking and design-related sites.

The forum participants have also moved beyond socializing to collaborating on design projects. In recent years there have been a series of HOWiezine projects, each with a different theme. Participants are responsible for designing, producing and submitting their zine pages, which are then compiled and distributed in complete magazine form by hard-working little HOWie elves. I'm usually too involved in writing or design projects to play with the other kids. However, I did participate in a HOWie cookbook project a couple years ago.

Late last year the HOWie poster project idea hit the pages of the forum. Through months of forum posts a theme was selected, forum visitors were able to sign up to participate, rough concepts were presented and all aspects of the project could be followed by all participants. HOWie poster diva (and that is meant in the best possible context) Jas Wabbington (Screen name: WabbingtonDesign) led the troops through the process and deserves a huge "thank you" for her efforts in herding 37 designers on one project. She also art directed and illustrated the poster in which HOWie participants show "Our True Colors" as color chips growing on a beautiful tree. HOWie poster project manager "jroz" deserves a tip of the HOWie hat, too. As does HOWie "mathias' for coming up with the initial concept. Ryan at Direct Edge Media deserves a "toot!" for the great printing job.

My HOWie poster arrived in the mail yesterday. The end result of the fun collaborative effort will find a special place on my studio wall - when the organizing of 30 years of design files/books is completed and I can actually find a wall.

© 2007 Jeff Fisher LogoMotives
"Reativity" graphically evolves into "Creativity"

Last year when I received email notification of the Creativity Annual Awards, the first thing I noticed was the new swoosh-o-licious identity that seemed to read as the "Reativity Annual Awards." I certainly wasn't the only one who noticed, as comments soon appeared on Internet design forums and blogs around the creative world. Introducing such a public logo with major readability issues (and I'm not even addressing the swoosh issue here), especially with target market of design professionals, seemed like a silly thing for such accomplished creative people to do.

I felt kind of bad picking on the annual awards competition last year - but there was that misstep of conducting a speculative "contest" to create the book cover. However, other designers did a good job of picking on them as well. To the credit of the Creativity Awards, the book cover "contest" was canceled with a very public apology to the design community and all was right with the world.

Still, in the back of my mind, there was the issue of that "Reativity" logo.

This morning I received an email announcing the 2007 Creativity Annual Awards. Yes, you did read that correctly - the logo now says "Creativity" Annual Awards. I guess the powers-that-be did realize there might be a readability issue. The simple addition of a "C" makes the logo much easier to read. The swoosh, which is now almost a background element almost isn't noticed as much any longer. Almost. And then I clicked on the email link and was taken once again to the Reativity Awards.

OK, admittedly that may be a cheap shot. The roll-out of a new, or revised, identity is a process and that complete evolution does take time in some situations. I did get a bit of a giggle out of the find.

By the way, entering the Creativity Awards may result in design work being honored and published in the best-selling annual - an often needed "pat on the back" for a designer and an excellent self-promotion opportunity. Good luck to those who participate.

© 2007 Jeff Fisher LogoMotives

Enjoying the outdoor office...

The past few days have been beautiful in Portland. As the annual Rose Festival event schedule begins many locals head out of Dodge or find a way to hibernate in their neighborhoods to avoid the parades, extra traffic, and bridges going up and down on "the moat" as the ships arrive/depart for the festivities. I will not leave the home studio much this next week - but, with the nice weather, I have moved out to the "summer office."

Yesterday, on The Serif - one of my favorite blogging "side tracks" - Jim and the gang were having some Friday fun posting shots of their work spaces. I sent over a photo of mine and succeeded in making eveyone a bit jealous. They even ended the day with a photo of Al Gore's office. (On the HOW Design Forum there's also been an ongoing workspace thread.)

The only drawback to working in my outdoor space is that I'm often distracted and end up playing in the dirt. Not a bad thing for digging up a little creativity...

© 2007 Jeff Fisher LogoMotives

A simple garden trellis project

The renovation of our garden continues. When Joy Creek Nursery had to remove an old rhododendron from what will become an outdoor kitchen area, a beautiful purple clematis lost its natural trellis. The old rhody found a new home out in the Joy Creek gardens, after being the model for a pruning class. The clematis, and several other plants, sat above ground, basically bare root, for a couple months before finding new homes among the revised hardscape.

I couldn't find trellises that I liked for the clematis. Most cost several hundred dollars and had patterns I didn't really want incorporated into our gardenscape. I roughed out a design on my computer for a set of trellises to be made out of copper pipe. My partner, Ed, previously made an arbor in a similar manner several years ago when he was practicing his copper pipe work prior to re-plumbing our home.

The trellises were designed to be approximately five feet wide and stand a total of five feet above the surface of the garden bed.

The materials needed for one trellis are:

• 8 pieces of 1/2 inch copper pipe cut to 24 inch lengths (you will want to use the thickest 1/2 inch pipe for added strength)

• 8 pieces of 1/2 inch copper pipe cut to 20 inch lengths

• 2 pieces of 1/2 inch copper pipe cut to 12 inch lengths

• 2 copper corner joints for 1/2 inch pipe

• 10 copper "tee" joints for 1/2 pipe

• 2 pieces of 3/8 inch rebar cut to 4 foot lengths

• 1 piece 1/4 inch copper tubing 5 feet in length

• 2 small metal screws 1/2 to 5/8 inches in length

The tools needed include:

• a handheld pipe cutter (available at the hardware store)

• the necessary solder and soldering equipment

• steel wool, sandpaper or a tool made for roughing up the pipe surfaces to be joined

• a container of flux and the necessary brush for "painting" it on the copper tubing

• a pair of gloves with a non-skid palm surface for assistance in holding the pipe while it is being cut

I cut all the copper lengths. On the flat surface of my patio, I then prefit all the pieces together to make sure all were correct and my trellis was going to be square. Ed then help me rough up all services that were to be soldered, but flux on both surfaces to be joines and soldered the frame at each joint. (many home improvement websites and books have great detail about the soldering process.)

I then formed the 5 foot length of 1/4 copper tubing into a spiral shape to serve as the centerpiece design element of the trellis. Spirals and swirls are patterns that have been repeated throughout our home in light fixtures, switchplate covers, light fixtures, fabrics, glassware, eating/serving utensils, dishes, interior art, garden art and elsewhere. Where the tubing was to meet the frame, I crimped the tubing flat with plyers and then drilled a hole (just smaller than the selected screws) through the flattened tupping and the "tee" joint where the swirl would be joined to the frame. The swirl was then screwed tightly into place.

Two pieces of rebar were then stuck about 1 foot into the ground at the distance determined by the width of the finished trellis. The finished trellis end pieces, or legs, where then forced over the rebar and pushed down to ground level. The previously homeless clematis was then planted in front of the trellis and I wove the new growth through the copper trellis frame.

The process was then duplicated for a second matching trellis. The plants seem very happy with their new homes - and I have trellises that also serve as garden art. I was thrilled that the finished trellises cost about $50 a piece in materials - due in part to the fact we already had the soldering supplies in our personal tool library - and were only a project of a few hours.

Note: You might also want to check out my copper and bronze hose guard project.

© 2007 Jeff Fisher LogoMotives

"Little Guys" offer big resources

As an independent graphic design business person I always like to support others in the same position. I'm pleased to give The Little Guys Network some exposure on bLog-oMotives. The group is a consortium of small businesses offering design profession resources.

The image companies in the "Little Guys" neighborhood include Andy Nortnik, ArtBitz, Art Parts, Havana Street and Miss Mary. Just down the street are the font firms Blue Vinyl Fonts, FontHaus, Fonthead Design and Letterhead Fonts. Around the corner are the design resources The Design Center and ideabook.com.

Fonthead Design is one of my personal favorites when it comes to type for some logo designs. In fact, I wrote about the company in a previous bLog-oMotives entry. I've also got a bit of a connection to Chuck Green, the individual behind ideabook.com - he was a contributor to my first book, The Savvy Designer's Guide to Success.

If you get a chance, take a look at The Little Guys Network. You'll find some great resources that may be a big help to you in future design efforts.

Illustration: Little Guys Network home page

© Jeff Fisher LogoMotives

Reflections on judging a design competition

Last week I was once again a judge for the international Summit Creative Awards. My cohorts in judging the primarily print category entries were Ilan Geva, of the new firm Ilan Geva & Friends, and Simon Coffin of Turner Studios. We spent two full days reviewing, commenting and rating hotel conference rooms full of logos, identity packages, packaging designs, self-promotion, annual reports, brochures, advertising, signage, copywriting, ideas never produced, and other items created by students, designers and creative firms from around the world.

A couple weeks ago I was asked by another designer if I would have the opportunity to travel for the judging. As a matter of fact, I did get to travel - to a hotel about four miles from my North Portland home studio.

Competition results will not be announced until the judging of broadcast, interactive media and emerging media is completed in the next month. Email or letter notification is scheduled to go out to all entrants by April 23 according to competition staff.

While somewhat fresh in my mind, I wanted to post some comments about the competition and my third Summit Creative Awards judging experience:

• Over the course of the Summit Awards history, design work from over 50 countries, on five continents, has been submitted. It is fascinating to see the scope of international work - especially the pieces submitted annually from designers in countries such as Dubai and Kuwait. It sure would be helpful to the judges if all the foreign entries included translations of the project text.

• The new rebranding/logo re-design category was very well received and I enjoyed seeing the many design solutions submitted. Unfortunately, not all submitters thought to include the "before" images for comparison to the final new identity.

• Hundreds of logos were submitted in the various identity categories. (I only had to excuse myself from judging one design I knew a bit too well.) Again, it would have been very helpful to those judging the design if all had included a short description of the type of business being identified - as requested in the call for entries. Taken completely out of context, it was difficult to give some well-designed images the credit probably deserved as a communication vehicle.

• The competition category that disappointed me was direct mail. It would seem that many designers do not understand how to create effective direct mail pieces. Paper folds didn't necessarily work well within the some designs, image/text placements were very awkward in some cases, and the required message often got lost in over-designed or cluttered pieces.

• The previous two years, when judging the Summit Awards, I walked into rooms full of pieces designed using lime green and orange as ink colors. Obviously, those colors were an over-used trend of the years prior to the submission deadlines. This year there was much more variety in the color treatment of materials in all categories. There did seem to be a greater use of earth tones, or subtle colors, that did not "scream" at the target audience.

• Paper textures, special ink treatments, unique bindings, the actual size of some submitted pieces, and even the smell of inks, always give the judges a wide variety of aspects to take into consideration when reviewing a piece of work. While the Internet upload option for competition entries is a valuable convenience for some designers - especially those in other countries who need to take shipping costs into consideration - and works well for logos, ads, and some stationery packages, many pieces lost so much being presented as a flat, color laser print.

• There is hope for the future of the design profession. Some of the student work submitted was incredible. Although the students are not creating projects in a "real world" atmosphere of clients, budgets, unrealistic deadlines and the like, the creativity, execution and presentation - swooshes, bevels, drop shadows and Photoshop effects - was all "there" in many of the university submissions

• Designers do have a lot of fun when it comes to creating their own stationery packages, promotion pieces and holiday promotions. (Again, I did need to excuse myself from judging two pieces in these sections, as there will be showcased in my future book.) Creativity oozed from some of the submitted work created with the designer, or creative firm, as their own client.

• Simple is good! When design work is presented in the competition setting next to hundreds of other pieces, the well-designed, beautifully executed, simple work stands out every time. Designers should consider that fact when sending pieces they are creating for clients - the end result needs to stand out in the sensory-overload world in which we live.

Judging such competitions is a great way to network with other design professionals while participating in a industry event, and possibily be inspired as a designer at the same time. I encourage others to contact industry design competitions in your area to offer your services as a judge or competition staff.

In the interest of full disclosure I should also mention that I participate annually in the Summit Creative Awards as a submitter. Since 1998 I have won 15 Summit Creative Awards, including two golds for identity design. Other designers should consider submitting their work to such competitions. My most recent list of design competitions is posted in an earlier bLog-oMotives entry.

I do want to thank Summit Creative Awards Executive Director Jocelyn Luciano and her excellent staff. The organization puts on a good show and treat the competition judges very well each year. It's a pleasure being associated with the organization.

Photo: Myself, Simon Coffin and Ilan Geva at the Marrakesh Moroccan Restaurant during the judging weekend

© 2007 Jeff Fisher LogoMotives

Toot! Toot!*: Jeff Fisher LogoMotives

featured in Creatively Self-Employed

Jeff Fisher, the Engineer of Creative Identity for the design firm Jeff Fisher LogoMotives, is featured in the recently released book Creatively Self-Employed: How Writers and Artists Deal with Career Ups and Downs, by writer Kristen Fischer. In the book, more than 65 creative types - writers, designers, painters, illustrators and others - speak out about dealing with rejection, coping with loneliness and building strong businesses. Any creative professional, either starting an new business venture or looking to give their existing efforts an infusion of inspiration, will find the volume a valuable resource.

The author says she included Fisher as "a Creative Profile in a chapter about support, and also to discuss how to stay physically healthy - and what can happen when we don't."

Jeff Fisher has worked independently as a graphic designer, specializing in logo design, for all but three years since moving to Portland, Oregon in 1980. Since then he has received over 500 regional, national and international design awards for his logo design efforts, and his work is featured in over 80 books about logos, the business of design, and small business marketing. He shared many of his own business experiences in his initial book, The Savvy Designer's Guide to Success, which was released in 2004. A second book, Identity Crisis!, is currently in production and will be on bookstore shelves in the fall of 2007.

Other "creative types" featured in the book include "real world" industry friends Ilise Benun, Von Glitschka, Cat Morley - founder of Designers Who Blog, and Neil Tortorella. The experiences of cyber acquaintances Art Javid, Kristen King (also a recent client), Calvin Lee, Chris Tomlinson, and Tamar Wallace are also highlighted.

Kristen Fischer is a New Jersey copywriter with a wide range of print and Web copywriting experience. More information about the author, and her first book, is available at her Creatively Self-Employed website

Creatively Self-Employed is available through online booksellers such as Barnes & Noble and Amazon.com.

Note: Photo courtesy of Kristen Fischer

(*If I don't "toot!" my own horn, no one else will.)

© 2007 Jeff Fisher LogoMotives

Jeff Fisher LogoMotives represented in

two new graphic design books

Yesterday my mail delivery brought me copies of two new graphic design books in which comments by me, or examples of my work, are featured. Today I am getting high off the fumes of printing ink as I flip through the fresh-off-the-press volumes

The first is Caffeine for the Creative Mind: 250 exercises to wake up your brain by Stefan Mumaw and Wendy Lee Oldfield. The book, from HOW Design Books, is a collection of over 250 brain- stretching creative exercises; feedback on exercises tried by designers, illustrators, photographers, professors and others; and interviews with industry professionals. Wendy Lee Oldfield interviewed me for the book about 17 months ago when I was speaking at the HOW Design Conference in San Diego. The result of that meeting is highlighted in the book, along with interviews of Terry Marks, Kevin Carroll, Denise Weyhrich, Brian Sack, Steve Morris, Mike Dietz, Peleg Top, John Sayles and Sheree Clark of Sayles Graphic Design, John Foster, and Von Glitschka.

The book is sure to be an instant hit with "creative types" around the world - and will most likely soon be found on the book lists of many design schools. Now, I just need to find the time to sit down and read it from cover to cover.

The second book in my mailbox yesterday was American Corporate Identity from David E. Carter. The design annual features the winning graphic design entries from the American Corporate Identity 22 competition. Four of my logo designs - for the Benicia Historical Museum, NoBox Design, Twisted Elegance Interactive and Just Out newsmagazine - are included in the volume. The designs were presented in a previous bLog-oMotives entry when the winning entries were announced by competition organizers.

Since 1998, when I first started entering the American Corporate Identity competitions, 24 logo designs and one marketing collateral package designed by Jeff Fisher LogoMotives have won the Awards of Excellence and been featured in the annual publications. The deadline for the next competiton will be in December of this year.

© 2006 Jeff Fisher LogoMotives

How does your garden grow?

Gardening is my therapy and a passion. Nothing recharges my creativity like getting outdoors to play in the dirt. I can get lost in my gardening for hours; all the while coming up with design project solutions in my head. In previous bLog-oMotive entries (Part One and Part Deux) I presented an article written for a neighborhood newspaper about the garden of the North Portland home I share with my partner, Ed. In the second piece I mentioned that Joy Creek Nursery would be renovating our backyard at some point this year. I had no idea how soon it would be happening or how great the end result would look.

Three weeks ago our friend Mike Smith, one of the owners of Joy Creek Nursery, stopped by to ask if we could be ready for the project to begin the following day. Another landscape project had been delayed and he had a crew available. Ed's only concern was that the project be completed by the scheduled June 17th barbecue celebrating his sister's graduation from college. Mike and I began discussing the removal of all the concrete surfaces in the yard, creation of a large patio of tumbled pavers, the construction of some raised gardening beds, the installation of a stone bench for added seating, a possible future water feature and more.

Bright and early the next morning the Joy Creek crew showed up to begin the process of breaking up the old, thick concrete pad next to the garage. It had never been an inviting space for entertaining or spending time outdoors. Large woody rosemary bushes were ripped out of the ground, all remnants of Ed's former vegetable garden disappeared, the existing irrigation system was removed and some plants were potted up to be included in the new garden design. By the end of the day several truck loads of concrete, rocks, dirt and plant material had been hauled away from our yard. All that remained were a variety of existing plantings under our large pink dogwood tree, some vegetation across the back by the fence, and a few mature plants (including my beautiful Sun Power hosta) up against the house that would give the new garden some sense of history.

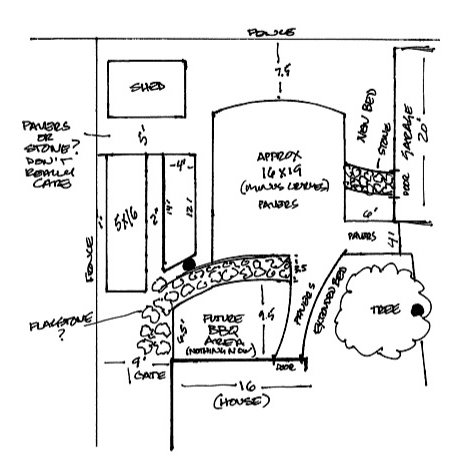
The next morning I walked out into what was now a blank canvas for our future outdoor entertaining space. Based on my discussions with Mike, I started taking measurements to determine how all the various elements would come together. Armed with a can of spray paint, I drew out a "floor plan," of where things would eventually be located, on the bare dirt. As no real plans existed for the project, the designer in me kicked in and I decided to rough out some additional details on paper. I was thrilled to be getting a new 6' x 20" flowerbed next to the garage. Ed was already looking forward to his 4' x 13' raised herb bed and 5' x 16' raised vegetable garden. My concern was that a large patio of tumbled pavers (approximately 16' x 20'), with a straight walkway from the backdoor of the house, might end up looking like a bumpy basketball court plopped in the middle of our yard. I sketched out curves on the walk from the house and at each end of the patio. Then, after emailing my rough plans to the nursery and taping a copy to the back door for the crew, we packed our bags and headed out of town for five days.

It was a bit odd leaving town and not really knowing what to expect when we returned home. The next day a phone call from Mike resulted in negotiations about the curves on my plans. I got my curves on the walkway, as a great way to introduce people to the patio, and the curves on each end of the patio were eliminated. Mike convinced me that my "basketball court" concern would be eased with plantings to soften the edges of the patio.

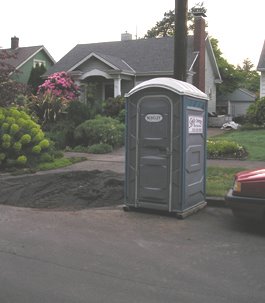
While in Seattle, celebrating my 50th birthday, I saw news reports of monsoons in Portland - with coverage of downed trees, power outages and flooded streets. I could just imagine the Joy Creek crew working in a mess of mud. I was really looking forward to getting home and seeing what had been accomplished in the inclement weather. Returning to Portland we immediately realized we were now living in a construction zone when seeing the porta-potty parked in front of our house (well, actually in front of our next-door neighbor's home), and piles of gravel, pallets of concrete pavers and a pile of Trex in our driveway. Most of our backyard was under a huge blue plastic tarp; allowing the workers to continue their efforts in the heavy rainstorms. With each day visible progress was made as things really began to take the shape of my rough plan. Ed had to leave town for business once again, so I was left to approve any minor changes to the project as the crew continued their great work. At the end of each day, I would take photos and email them to Ed for his review.

Last Friday the crew spent the morning finishing up their work on the hardscape. Final touches included fine-tuning the irrigation system - Ed's gardening toy that is all set on timers. I'd been busy working when I realized it was completely quiet outside for the first time in a couple weeks. I stepped outside into a beautiful and serene backyard space that seemed much larger than before the renovation.

On Saturday, Mike came by with several flats of plants for the new beds. We also took a little field trip to a couple rock yards to check out stones for a bench to go in front of Ed's raised herb bed and a basalt pillar water feature that will be at the edge of the patio near the path to the backdoor. When I got back home most of the afternoon was spent planting the selection of new fuschias, Abyssinian Stars, anemones, arroyo lupine, black mondo grass, small hostas, dahlias, diascias and penstemons. Ed returned from his business trip that evening and seemed a bit stunned as he walked into the newly completed garden space. The next evening we entertained our first guests, friends Mary and Kate, in our new garden.

The Joy Creek Nursery crew did an incredible job on our garden project. There's still a bit of work to be done prior to the upcoming graduation party. Ed needs to get his raised beds planted. I'm going to a couple nurseries this afternoon for some annuals to fill the many large pots that will be placed on the patio. Phase I of our backyard renovation is done. Still to come are the French doors out of our bedroom and a deck for the hot tub. That will be followed by an outdoor kitchen area, with a sink and prep station, making space for Ed's large stainless steel grill (commonly referred to around our house as "the penis extender").

We're looking forward to getting a lot of use out of our new backyard garden. In fact, I sat out at the table working on my PowerBook much of the morning yesterday.

© 2006 Jeff Fisher LogoMotives

Overlapping orbits in the blog-o-sphere

Some time ago I posted a bLog-oMotives entry about Kevin Carroll - and his words of wisdom appearing on Starbucks coffee cups around the U.S. It seems that my post caught the attention of KC himself.

Today, my blog entry is quoted in It's a Blogger's Universe!! on his Katalyst Consultancy Blog. Thanks for the mention! In fact, yesterday I had an email from a member of Kevin's staff, informing me of my impending appearance on his blog, and mentioning I was an "inspiration to Kevin around setting up our blog." It's not a bad thing to be able to send some inspiration in the direction of one who inspires so many others, including myself.

Coincidently, his inspiration just came my way in the form of a gift of Kevin's book, Rules of the Red Rubber Ball: Find and Sustain Your Life's Work, from my friends Lisa and Bev at my surprise birthday party this past weekend. Now, I just need to play stalker to get Kevin to sign my copy. Actually, that shouldn't be too difficult, with Portland being his home base as well.

© 2006 Jeff Fisher LogoMotives