Showing posts with label Joy Creek Nursery. Show all posts

Writer|designer Ellen Shapiro 'digs' my early blooms

Yesterday I received a Facebook direct message from writer/designer Ellen Shapiro, in regards to some early 2011 garden photos I have posted on my personal Facebook page and on Flickr. From her home in snowy New York, photographic documentation that anything was blooming anywhere must have offered hope that this winter might yet end. Shapiro asked if some of my garden images could be shared on her garden and design blog, ">Dig It!"

Today a little bit of spring was presented to "Dig It!" readers, in the form of the entry "It's Spring (Somewhere)." I appreciate Shapiro's interest in my gardening efforts - and for giving friends Joy Creek Nursery a mention. She also writes of her intention to check in occasionally on my garden throughout the coming year.

For several years now, I have shared my gardening adventures on bLog-oMotives and in Flickr galleries for the years 2010, 2009 and 2008.

Graphic designer, writer, and gardener Ellen Shapiro is based in Irvington, New York. A frequent contributor to design magazines including Print, Communication Arts, and Etapes, she writes about trends, issues and personalities in design, illustration, photography, and visual culture around the world. She was also a contributor to the book, Identity Crisis!: 50 Redesigns That Transformed Stale Identities into Successful Brands, by Jeff Fisher.

© 2011 Jeff Fisher LogoMotives

A visual stroll through the year in my garden

Winter is here and another year in my garden has come to an end. Throughout 2010, gardening was my best and favorite therapy. When I needed a break from designing or writing, it was always great to simply step outside of my home studio and spend some time playing in the dirt.

This past week, it was a wonderful treat to have Joy Creek Nursery send a crew over to do a seasonal clean-up of our garden (above). After the visit by the gardeners, I was able to get the last 150 bulbs planted for spring. For the most part, the garden is prepared for a Portland winter - there's even a forecast of a possible dusting of snow this week. I'm a bit concerned that some older bulbs in my beds think winter has already passed, as they are already poking through the soil, compost and gravel.

Over the past 12 months, as plants have grown, come into bloom or been added to the beds, I have documented the activity with my camera. I invite you to take a visual stroll through a year in my garden by way of a Flickr gallery of my images.

Best wishes for a new year of happy gardening!

© 2010 Jeff Fisher LogoMotives

Spring 2010: Does your garden grow?

It has been a less than ideal spring in the Pacific Northwest - especially if you are a gardener. Playing in the dirt of my garden is a favorite source of therapy and inspiration. With the recent cold, rain and cloudy days, the garden is not flourishing as in past years.

Our garden did get off to a good start this spring. While we were on vacation in St. Croix in March, a crew from Joy Creek Nursery spent two days cleaning things up, removing plants damaged by the winter storms of the past two years and pruning the pink dogwood behind our home. I did have a blank slate for moving some plants around and the addition of many new items.

While things are a bit behind the usual season - and much wetter - there has still been a lot of color in the garden. As plants have poked through the soil, come into bloom or been added to the beds, I have contibuted photos to my 2010 Flickr gallery of garden images.

© 2010 Jeff Fisher LogoMotives

A simple garden trellis project [Redux]

The renovation of our garden continues. When Joy Creek Nursery had to remove an old rhododendron from what will become an outdoor kitchen area, a beautiful purple clematis lost its natural trellis. The old rhody found a new home out in the Joy Creek gardens, after being the model for a pruning class. The clematis, and several other plants, sat above ground, basically bare root, for a couple months before finding new homes among the revised hardscape.

I couldn't find trellises that I liked for the clematis. Most cost several hundred dollars and had patterns I didn't really want incorporated into our gardenscape. I roughed out a design on my computer for a set of trellises to be made out of copper pipe. My partner, Ed, previously made an arbor in a similar manner several years ago when he was practicing his copper pipe work prior to re-plumbing our home.

The trellises were designed to be approximately five feet wide and stand a total of five feet above the surface of the garden bed.

The materials needed for one trellis are:

• 8 pieces of 1/2 inch copper pipe cut to 24 inch lengths (you will want to use the thickest 1/2 inch pipe for added strength)

• 8 pieces of 1/2 inch copper pipe cut to 20 inch lengths

• 2 pieces of 1/2 inch copper pipe cut to 12 inch lengths

• 2 copper corner joints for 1/2 inch pipe

• 10 copper "tee" joints for 1/2 pipe

• 2 pieces of 3/8 inch rebar cut to 4 foot lengths

• 1 piece 1/4 inch copper tubing 5 feet in length

• 2 small metal screws 1/2 to 5/8 inches in length

The tools needed include:

• a handheld pipe cutter (available at the hardware store)

• the necessary solder and soldering equipment

• steel wool, sandpaper or a tool made for roughing up the pipe surfaces to be joined

• a container of flux and the necessary brush for "painting" it on the copper tubing

• a pair of gloves with a non-skid palm surface for assistance in holding the pipe while it is being cut

I cut all the copper lengths. On the flat surface of my patio, I then prefit all the pieces together to make sure all were correct and my trellis was going to be square. Ed then help me rough up all services that were to be soldered, but flux on both surfaces to be joines and soldered the frame at each joint. (many home improvement websites and books have great detail about the soldering process.)

I then formed the 5 foot length of 1/4 copper tubing into a spiral shape to serve as the centerpiece design element of the trellis. Spirals and swirls are patterns that have been repeated throughout our home in light fixtures, switchplate covers, light fixtures, fabrics, glassware, eating/serving utensils, dishes, interior art, garden art and elsewhere. Where the tubing was to meet the frame, I crimped the tubing flat with plyers and then drilled a hole (just smaller than the selected screws) through the flattened tupping and the "tee" joint where the swirl would be joined to the frame. The swirl was then screwed tightly into place.

Two pieces of rebar were then stuck about 1 foot into the ground at the distance determined by the width of the finished trellis. The finished trellis end pieces, or legs, where then forced over the rebar and pushed down to ground level. The previously homeless clematis was then planted in front of the trellis and I wove the new growth through the copper trellis frame.

The process was then duplicated for a second matching trellis. The plants seem very happy with their new homes - and I have trellises that also serve as garden art. I was thrilled that the finished trellises cost about $50 a piece in materials - due in part to the fact we already had the soldering supplies in our personal tool library - and were only a project of a few hours.

Note: You might also want to check out my copper and bronze hose guard and flower pot patio umbrella stand projects.

© 2010 Jeff Fisher LogoMotives

My garden awakens from a rough winter

Over the 2008 holidays my garden got clobbered. The day I left for a two-week vacation to the Big Island of Hawaii the snow began. It literally started snowing while I was sitting in the plane on the runway at PDX. While in paradise, our next-door neighbor sent us a photo of some of the snow and ice in our yard (below). When we returned just before New Year's snow and ice still remained from the unusual weather. The damage to many plants was evident. With spring we will be able to inventory what did not survive the extended period of cold.

A landscape crew from Joy Creek Nursery recently spent two days cleaning up the winter storm damage and prepping the garden for spring - with a couple additional snow days thrown in for good measure. The survival of some plants is a bit "iffy." The New Zealand flax in front of the house probably took the biggest hit. The crew cut it back to about one foot from the ground. Our incredible daphne, which split under the weight of snow and ice, received a little repair work - with hopes for a full recovery. Many other crushed and broken plantings received a more drastic and earlier pruning than in previous years.

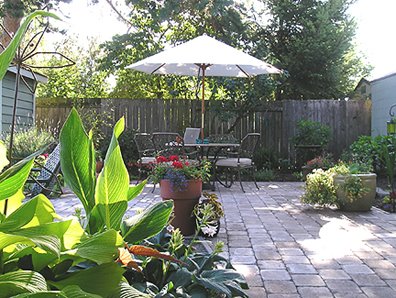
This past summer I was incredibly proud of my garden becoming a lush paradise (above). In fact, I was thrilled when I completed the front patio - and it appeared on the ApartmentTherapy website.

When the Joy Creek crew was done with their maintenance work I was a bit stunned. The clean-up was much more dramatic than in the past. My garden hasn't been so bare in years (above and below).

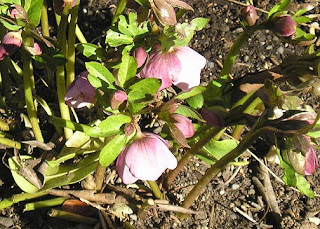
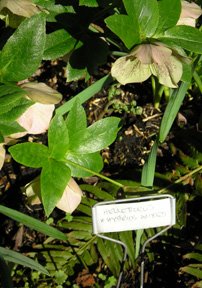
With milder temperatures, and several beautiful sunny days, the garden is starting to come alive. The snowdrops, croci and hellabores are blooming (below). Daffodils and other bulbs are pushing through the soil. New growth is appearing on many plants throughout the garden.

Soon I will be back outside "playing in the dirt," and getting a good dose of my garden therapy and inspiration.

© 2009 Jeff Fisher LogoMotives

No garden "tinkle box" for now

Since my partner Ed and I moved into our North Portland home over a decade ago our garden has been a constant work-in-progress - and my best therapy in escaping from my home studio. Last year a major garden renovation took place with the removal of the last bit of lawn, the installation of a new patio in front of the house, the creation of an area that will eventually become a finished outdoor kitchen, and more.

Just over a year ago things looked a little torn up in our back yard (above), as a crew from Joy Creek Nursery extended the patio and formed new flower beds. Since then a pile of leftover sand has marked where I hoped a basalt pillar water feature would be installed - with a steel "tinkle box" buried below ground level to amplify the sound of the flowing water. The entire fountain/dribbler project was estimated to cost about $1000.

With other house projects taking priority - and there are always other house projects with a 1929 home - and the need to reign in unnecessary spending like everyone else, the water feature was easily eliminated from our household budget this spring. I was tired of staring at a pile of sand outside of the back door - even though neighborhood cats were enjoying the makeshift "kitty litter box" in the middle of our garden.

This past weekend, when we actually had some spring-like weather for a few hours, I was out shoveling sand and distributing it around the yard. I found a few appropriate rocks in the supply piled on the driveway and placed them in the bed. Some bare-root plants - displaced by the recently planted aucuba - required a new home, as did the beautiful Brad Messinger pottery birdbath. Throughout the garden some "editing" of overcrowded beds was necessary, as was the dividing of other plants.

A few hostas, a black mondo grass, a hardy gardenia, and a fuchsia all found their way to the new garden space. They were joined by a black fern, a saxifraga, a Veronica ground-cover, an ornamental thistle and some later-blooming bulbs, including my favorite calla lily, Flame. One of our plastic squirrels and a piece of frog garden art made by Ed's father even found a place in the bed.

In a period of just over two hours I transformed the naked space (above) - without spending a cent. Actually, I felt as if I'd just saved myself the $1000 it would have cost for my water feature. In the afternoon I planned to make use of a couple nursery gift certificates to fill the bed in with the addition of some colorful annuals. However, with snow and freezing temperatures still in the forecast, I think I'll wait until spring finally decides to hang around for a while. The electrical outlet - in part for for the use of my PowerBook when out in my "outdoor office" - still needs to be installed, and plant growth will soon fill in the new garden bed. Still, the view from the kitchen window (above right) was greatly improved in the short period of time I was playing in the dirt.

© 2008 Jeff Fisher LogoMotives

Let the gardening begin...

Maybe spring is coming to Portland this year. At least my garden, sometimes a topic on bLog-oMotives, seems to finally think so. Still, in the last two weeks we've had snow, hail, frost, thunderstorms and a lot of rain (Above - blooming euphorbia, rosemary and tulips in the snow). A few things are starting to bloom or poke their way out of the soil. Perhaps it is time to "play in the dirt" - my favorite form of therapy and inspiration.

Our garden has taken quite a beating this past winter - especially through the windstorms. However, we got off lucky compared to some neighbors. The back of our North Portland home had been fairly private until one of the November windstorms. With the house shaking, and power flickering off and on, I walked through our kitchen and glanced out the back window. I did a double-take because I could now look directly into our neighbor's kitchen and family room. Three of the trees in our neighbor's yard, which had previously obscured the view, had been snapped off about five feet up from the ground by the wind.

Our neighbors suddenly had a great view directly into our kitchen, bedroom and backyard hot tub as well. We were not sure of the solution, but knew something had to be done - and soon. The situation was discussed with our friend Mike Smith of Joy Creek Nursery and he thought he had a solution. In the stock section of the nursery he had a plant that had been rescued from another client's garden renovation. He took us to see the huge Aucuba japonica 'Picturata'- and Ed and I both agreed the leafy plant with vibrant green variegated foliage would be a great "fix" in our garden.

A Joy Creek crew showed up today with the plant filling the back of the truck. It had taken five people to load the thing into the truck and our crew of two had quite time unloading and getting it into position. We had to lend a hand getting the Aucuba set in place. Of course, installing such a large plant meant a few existing plantings needed to be relocated - a few are still out there needing new homes elsewhere.

The best thing is that we're no longer looking directly at our neighbors and they don't need to see all we are up to either. I'm looking forward to the new garden resident settling in and my other plants growing up around it. It's kind of funny; in doing a little research on the Aucuba I noticed that it is often described as slow growing, with a mature size of 4 feet to 6 feet in height and width. Someone needs to tell this to the plant in our garden - it's over 8 feet high and just about as wide. I suppose there's not need for it to be any different than many of the other over-performers growing in my garden.

The center set of photos show the view from the deck off our bedroom, before and after the arrival of the Acuba. The lower set show the same from our kitchen door. It does look as if I should get out into the garden and get a bit dirty.

Great job Joy Creek!

© 2008 Jeff Fisher LogoMotives

This is war! - Gardening nut vs. squirrel

Gardening is a passion - and my therapy. Nothing is better for getting the old creative juices flowing than to spend a few hours out playing the dirt. Once I'm away from the computer, the design "brain farts" seem to come at me from all directions. The added result of my therapy sessions is our home being referred to by many in North Portland with the comment, "Oh, you live in the house with THE garden." With help from our friends at Joy Creek Nursery our garden does literally stop traffic on the street in front of our house.

Since moving into the house, my partner Ed and I have been engaged in an on-going battle with the neighborhood squirrels. They tease us from the trees, fence and rooftops - and have been known to drop pinecones and other items on us as we walk outside. In fact, last night - while we were having dinner on the patio, a squirrel dropped a pinecone from a tree and it bounced off the patio table umbrella into Ed's lap. You could hear the creature laughing from above. One morning I looked out the window, while on the phone with Ed, to see two of the critters on the peak of our garden shed roof taking part in a mating activity that made it look as if we had a live animal whirly-gig. The varmints plant walnuts and acorns in my flower beds, and move bulbs wherever they wish. We have noisy squirrel races from our garage, to the dogwood tree, and with a flying leap continuing across the roof of the house on a path to the neighborhood park full of tall evergreen trees. Ed refers to it as the "squirrel freeway."

We do attempt to fight back - or at least tease the furry little beasts. Ed chatters right back, chases them with the garden hose at full blast, and shakes the dogwood tree in some kind of game he has with the squirrels. A couple of them will make all kinds of noise until Ed comes out in the backyard garden to play with them. This summer we have yet to get out the "super soakers" for squirrel target practice as they zip back and forth on the top of the fence bordering the back of our property.

I will admit I now get a great deal of pleasure repeatedly seeing distraught, confused squirrels, standing on their haunches on the new paver patio, looking all around for the lawn in which nuts had been buried the previous year. They kind of have an "Oh, my God - what's happened here? I know I buried the stash in this location" kind of look on their faces.

Ed proclaims to all that he hates the squirrels. However, truth be told, earlier this year he actually nursed one back to health. One night he arrived home from work, walked in the house and told me I had better shut the garage if door I didn't want a "furry rodent" setting up home in it. Closer inspection revealed that the young squirrel in question was injured, as if it had fallen from a tree. A bit later I ran into Ed as he headed out the back door with a dish of water, a couple small carrots and a handful of walnut halves. He was going to feed the thing!!! It had taken up refuge in a basement window well and for several days Ed made sure it was cared for properly. The next weekend we took a trip out of town and, upon our return, our new little patient had moved on. Ed has since told me he's seen the squirrel, with its unusual facial markings, around the garden.

Our squirrel situation has not gone unnoticed by friends. One in particular, Brett - the "evil devil pig friend from hell," has taken a great deal of joy in our squirrel battles. For several years we've received all kinds of lovely squirrel-related gifts that he has found at garage sales and thrift stores. A few years ago he started leaving little plastic squirrel statuary artistically located in our garden when we were out of town. Over the years I've left them in place - although I could only find four of them this morning to photograph for this bLog-oMotives entry.

Visitors always ask about the tiny garden ornaments and I have to tell the whole "evil devil pig friend from hell" story. I hadn't even thought about the plastic squirrels when Mike Darcy came to shoot an episode of his television show, In The Garden, in our garden. Of course, he zeroed in on the fake critters and an explanation was required.

This whole long story has been necessary to explain why I have declared war on the squirrels this Independence Day.

Four times in the last ten days I have walked outside to one of the plastic squirrels laying on its side on the driveway or paver path to the front porch. I think one of the local squirrels is trying to "violate' its counterpart of the resin variety. My drip water line has also been yanked out of the flower bed on each occasion, as has a poor battered Saxifraga umbrosa 'Variegata'. Compost is always scattered everywhere. It happened again this morning (see photo at top of blog entry) - and now I'm ticked off.

I repositioned the drip line and secured it with metal prongs. The soil was put back in place and a new Saxifraga replaced the now dead previous plant. My little plastic squirrel was put back where he belongs - and I then sprinkled cayenne pepper powder all around the area.

That should light up the damn squirrel's Fourth of July if he tries any funny stuff. Let the games begin...

© 2007 Jeff Fisher LogoMotives

A simple garden trellis project

The renovation of our garden continues. When Joy Creek Nursery had to remove an old rhododendron from what will become an outdoor kitchen area, a beautiful purple clematis lost its natural trellis. The old rhody found a new home out in the Joy Creek gardens, after being the model for a pruning class. The clematis, and several other plants, sat above ground, basically bare root, for a couple months before finding new homes among the revised hardscape.

I couldn't find trellises that I liked for the clematis. Most cost several hundred dollars and had patterns I didn't really want incorporated into our gardenscape. I roughed out a design on my computer for a set of trellises to be made out of copper pipe. My partner, Ed, previously made an arbor in a similar manner several years ago when he was practicing his copper pipe work prior to re-plumbing our home.

The trellises were designed to be approximately five feet wide and stand a total of five feet above the surface of the garden bed.

The materials needed for one trellis are:

• 8 pieces of 1/2 inch copper pipe cut to 24 inch lengths (you will want to use the thickest 1/2 inch pipe for added strength)

• 8 pieces of 1/2 inch copper pipe cut to 20 inch lengths

• 2 pieces of 1/2 inch copper pipe cut to 12 inch lengths

• 2 copper corner joints for 1/2 inch pipe

• 10 copper "tee" joints for 1/2 pipe

• 2 pieces of 3/8 inch rebar cut to 4 foot lengths

• 1 piece 1/4 inch copper tubing 5 feet in length

• 2 small metal screws 1/2 to 5/8 inches in length

The tools needed include:

• a handheld pipe cutter (available at the hardware store)

• the necessary solder and soldering equipment

• steel wool, sandpaper or a tool made for roughing up the pipe surfaces to be joined

• a container of flux and the necessary brush for "painting" it on the copper tubing

• a pair of gloves with a non-skid palm surface for assistance in holding the pipe while it is being cut

I cut all the copper lengths. On the flat surface of my patio, I then prefit all the pieces together to make sure all were correct and my trellis was going to be square. Ed then help me rough up all services that were to be soldered, but flux on both surfaces to be joines and soldered the frame at each joint. (many home improvement websites and books have great detail about the soldering process.)

I then formed the 5 foot length of 1/4 copper tubing into a spiral shape to serve as the centerpiece design element of the trellis. Spirals and swirls are patterns that have been repeated throughout our home in light fixtures, switchplate covers, light fixtures, fabrics, glassware, eating/serving utensils, dishes, interior art, garden art and elsewhere. Where the tubing was to meet the frame, I crimped the tubing flat with plyers and then drilled a hole (just smaller than the selected screws) through the flattened tupping and the "tee" joint where the swirl would be joined to the frame. The swirl was then screwed tightly into place.

Two pieces of rebar were then stuck about 1 foot into the ground at the distance determined by the width of the finished trellis. The finished trellis end pieces, or legs, where then forced over the rebar and pushed down to ground level. The previously homeless clematis was then planted in front of the trellis and I wove the new growth through the copper trellis frame.

The process was then duplicated for a second matching trellis. The plants seem very happy with their new homes - and I have trellises that also serve as garden art. I was thrilled that the finished trellises cost about $50 a piece in materials - due in part to the fact we already had the soldering supplies in our personal tool library - and were only a project of a few hours.

Note: You might also want to check out my copper and bronze hose guard project.

© 2007 Jeff Fisher LogoMotives

Re-Design: Joy Creek Nursery

With gardening season upon us (at least in the Pacific Northwest with improvements in the weather), I look forward to pushing myself away from the computer much more for some playing in the dirt as "garden therapy." My partner Ed, family and friends still marvel, and snicker, at the fact I've become a such a gardener since moving to our North Portland house. Part of my enthusiasm is due to the efforts of Joy Creek Nursery in preparing an incredible palette for the digging, planting, weeding and enjoyment of my garden. As Joy Creek Nursery celebrates a 15th year in business I'm taking a look back at their logo redesign project.

The original logo for Joy Creek Nursery was created by a local print shop out of an immediate need when the business started. A “brand” for the company was then established by using the existing identity on signage, business cards, print ads, catalogues and other items. For designing other marketing and promotion items, and use by the owners, a digital logo was provided in the resolution shown.

In 1998, my thoughts about the existing logo, and its reproduction issues, were conveyed to the owners, who are friends of mine. The inconsistent weight of the letters in the text, the haphazard computer manipulation of the letterforms, the poor quality of the only existing digital imagery, and the two typefaces used in the design blended to convey a graphically unprofessional image for the high-end specialty nursery.

The client expressed concern about introducing a “new” logo after having been in business for some time. They were informed that a “revised” design could maintain a sense of the existing brand, while projecting more professionalism.

The new logo, using a more elegant type, still says “Joy Creek Nursery” to the firm’s clients and vendors. The flowing form between the words hints at the actual creek flowing through the nursery property when presented in blue and conveys an image of the rolling hills of the area when the logo is printed produced as a one-color design in green.

The Joy Creek identity has received its fair share of recognition. The design received a LOGO 2001 award and, as a result appears in the book The New Big Book of Logos. It also is featured in the volumes Logo Design for Small Business 2, Logos Redesigned: How 200 Companies Successfully Changed Their Image and New Logo World (Japan).

Previous bLog-oMotives entries featured additional identity re-designs: Benicia Historical Museum • Our House of Portland • North Portland Business Association • Just Out • Laugh Lover's Ball. Redesigns from designers around the world are the focus of my next book, Identity Crisis!, to be released in the fall of 2007.

You can read the latest from Joy Creek Nursery on their blog, The Joy Creek Times

© 2007 Jeff Fisher LogoMotives

A small garden "jump start" for spring

I'm living in a construction zone. Nearly two weeks ago a landscape crew, from Joy Creek Nursery, arrived on Monday to begin the renovation of the seven-year-old garden in the front of our home. Word was that our place was to be on a garden tour this summer for a regional landscape designer association conference and some changes needed to implemented. Some major pruning took place and the lawn was totally removed. The next day it snowed five inches and the ground was frozen solid. Thankfully most of the 700+ bulbs planted in the garden haven't noticed the weather much.

Last week a contractor was here all week sheetrocking, plastering and finishing the wall in our bedroom where Ed and I had installed French doors out to our new garden in the back (which was unveiled last summer). The deck is still to built for the hot tub and cafe table. I need to get in gear and order the wood mini-blinds, paint the bedroom and reconfigure the layout of all the furniture in the room.

This week the Joy Creek crew is again here and all the neighbors are wondering what the hell is going on. The garden cleanup has been fairly drastic. The old, woody lavenders (which were taking over the sidewalk) have been removed and will be replaced with new plantings. A new tumbled paver patio is now being installed where the lawn once was. Large flagstone steps will connect the patio with the driveway and the steps to the sidewalk. With the mature plantings blocking the view from the street, the patio will be another great place to sit and privately visit with guests. I plan to accesorize it with large pots of plants, a couple great Adirondack chairs and a table. Unfortunately, or perhaps fortunately, we also learned that our garden will not be toured until the summer 2008 conference.

The garden in the back is getting a major cleanup as well. A sick, damaged lilac was removed. A huge, old rhododendron was taken to its new home among others in the 4.5 acres of show gardens at Joy Creek. The squirrels are ticked off because the pink dogwood has been pruned - making their jump from the garage roof to the tree to the roof of the house a bit of a challenge. In the past the route has been a squirrel highway.

The planning of Ed's outdoor kitchen area is on the fast track as the crew will be here most of next week. All the plantings have been pulled out of the area, exposing part of the house we've never seen before, and we need to formulate a plan in the next couple of days. A "parking area" needs to be designed for Ed's manly stainless steel barbeque - commonly known as "The Penis Extender." We also must consider the installation of an outdoor sink and electrical. With the new kitchen area comes the planning for additional planting beds and a garden water feature.

Over the next ten days, lots of changes will be taking place. Then, upon return from a vacation, it will be time for my gardening passion to kick it - after all, it is my job to "make things pretty." I look forward to working with the existing plants, as I add new annuals and perennials to the mix. (The previous plantings are mentioned in bLog-oMotives entries here and here.) The new additions should include some interesting plants as we continue to serve as a Joy Creek test garden. I'll post some "after" images later.

Of course, all of this work creates additional projects for me. I now need to rid the yard of all cyclone fencing, and design new gates for the side of the house and the driveway. It's always something...

© 2007 Jeff Fisher LogoMotives

Cracked Pots and Twilight in the Garden

I'm currently sitting out at the table in my garden working from my PowerBook. In looking over my calendar I see that two of my favorite garden-related events are coming up this next week. Put them on your schedule as part of your recovery program following the expected heat wave here in Portland this weekend.

Cracked Pots presents their 7th Annual Garden Art Show July 25 & 26 (next Tuesday and Wednesday) at McMenamins Edgefield in Troutdale. From 1:00 p.m. to 8:00 p.m. over 60 local artists will be displaying and selling their garden art made from recycled materials. The Edgefield gardeners will also be having a plant sale each day from 1:00 p.m. to 5:00 p.m. Grab a brewski (my favorite on a hot summer day is always the Ruby) or summer cocktail from one of the numerous bars at Edgefield before taking an extended tour of the gardens and what the artists have to offer. My garden is home to several pieces purchased over the years at the event.

The internationally recognized Joy Creek Nursery hosts their annual "Twilight in the Garden" event on Saturday, July 29th from 6:00 p.m. to 9:00 p.m. The event gives visitors a chance to tour the beautiful 4+ acres of show gardens in the cool of the evening while enjoying light refreshments, live music by local high school jazz musicians and garden plantings highlighted by the light of dusk. It's also a great opportunity to check out the work of local artists. My garden features birdbaths, pots of all sizes and trellises from the selection at the Scappoose nursery.

Joy Creek is responsible for the design and installation of the gardens in both my front and back yards. The nursery is also a client of mine and I have designed the Joy Creek logo and many other marketing materials over the past 13 years. My partner and I have been long-time friends of owners Mike Smith and Maurice Horn. In fact, as we occasionally stay out at the home on the grounds of the nursery, we refer to the place as "our country house." "Twilight in the Garden" is a chance for others to have the evening nursery experience we've come to take for granted over the years.

Flower photo courtesy of Joy Creek Nursery

© 2006 Jeff Fisher LogoMotives

Spring has sprung (Part Deux)

This is part two of a newspaper article about my garden that appeared in the North Portland Press.The first installment was posted on bLog-oMotives here.

Joy Creek Nursery will be totally redesigning the back garden this year. Jeff and Ed plan to install French doors off their bedroom and build a deck - next to the recent hot tub addition - overlooking the garden. An excess of concrete will be removed and some replaced by the same pavers as in the front of the house. A stone walkway will replace one existing sidewalk. An arbor or pergola will be built adjacent to the garage and part of it will be covered to allow a year-round barbecue area for Ed. Plans include growing grapes and a wisteria on the structure.

Currently the back yard plantings include begonias, clematis, roses, honeysuckle, hostas, grasses, hydrangeas, fuchsias, a star jasmine, helebores, African daisies, dahlias, heuchera, primroses, datura, calla lilies, ornamental fruit-bearing blueberries, crocosmia, alstroemeria, epimedium, pulmonaria and many others. Many of the shade garden plants are very happy under the lilac or pink dogwood that were in the back yard originally.

How would you best describe your garden?
Eclectic and a color theorist’s nightmare.

What are the uses for your garden?
The biggest benefit of the garden is Jeff’s therapy from working at home. A plaque in the backyard reads “Play in the Dirt” and that is the best escape from working at home. The garden is also a great place to entertain and brings a great deal of enjoyment to neighbors and people just passing by. The vegetable garden provides a great deal of food throughout the year, including greens during the winter months.

How about maintenance and upkeep?
As mentioned above, the upkeep is a form of therapy. However, it is really kept at a minimum. Gravel paths were lined with a weed barrier prior to installation. The small gravel on the median and bed above the wall helps retain heat and moisture, while keeping weeds at a minimum. Compost is put on most of the beds a couple times a year and also keeps weeds at bay, or makes removal easy.

What about water usage and watering cost?
The use of timed irrigation system and drip irrigation equipment throughout most of the garden keep costs to a minimum. Most of the plants in the median and at the foreground of the front garden are somewhat Mediterranean and don’t require a lot of water. The gravel and compost bed covering also retain a lot of moisture.

Do you have tips for other gardeners?
Have fun. Don’t be afraid to experiment. There are no stupid questions when needing additional gardening information. Attend free classes and seminars offered by local nurseries or gardening organizations. Don’t be afraid to plant things wherever you want—if it doesn’t work out, in most cases you can move the plant somewhere else, at the appropriate time of season. Read gardening books and magazines, and attend gardening shows. Prior to moving into their house Jeff and Ed had not even lived in a residence that allowed for a garden.

Favorite part of your garden? Gardening?
A favorite aspect of the garden is that it literally has things blooming year-round. The compliments and comments of people passing by are always appreciated a great deal. Photographers for major national gardening magazines have photographed the garden for possible future stories and that is very gratifying. Ed enjoys the practical use of his vegetable garden. Jeff, as a graphic designer, appreciates the creativity of gardening and the therapeutic aspects.

Where do you shop for plants, bushes, trees, etc.?
Knowing the owners of Joy Creek Nursery in Scappoose, having worked with them over the years, and with their involvement in the design and installation of most of our garden, the vast majority of our plants still come from their nursery. Almost all of our annuals come from Marbott’s on NE Columbia Boulevard. Very seldom do we buy any plants from area grocery stores or home improvement stores. The plants are just not of the same quality as the nurseries we frequent and often don’t thrive—or, in some cases, don’t even survive.

What’s up with the little signs?
When the garden was first planted people would often come to the door to ask what specific plants were, or leave notes on the front door with plant identification questions. On occasion this would happen several times a day. The interruptions were hampering Jeff’s ability to work from his home office. The plant identification signs have helped immensely—and people will often be out front, with a notepad and pencil, writing down the names of various plants. Cars driving down the street literally stop in the middle of the road. People come with their cameras, and sometimes their landscape designers, to document what is going on in the garden.

Note: Every so often, throughout the rest of the gardening year, I will post updates from my therapy sessions in my garden. I hope others are having fun "playing in the dirt."

Check out the redesign and renovation of my backyard garden in How does your garden grow?

© 2006 Jeff Fisher LogoMotives

Spring has sprung - gardening's begun (Part 1)

I've recently spent a couple afternoons getting a good dose of my favorite therapy - gardening. Spring has officially arrived! When we first moved into our North Portland home, friends and family were stunned that I enjoyed getting outdoors to "play in the dirt" of our yard. I'd never had a garden before and found it easy to get lost in gardening as an escape from my work.

We constantly have people literally "stop and smell the roses" as they walk, or drive by, our house. Quite often people will ask where I live and, when I tell them, they will react knowingly with, "Oh, the house with the garden." There will be changes and additions to the garden with the new season. With the nice weather, and longer daylight hours, I will make my way outdoors more - and my gardening efforts will occasionally find their way to this blog.

Our garden has gotten a lot of attention over the past six years. Photographers for Martha Stewart Living and Better Homes & Gardens (their photographer stopped by while the police were investigating a portable meth lab parked across the street) have photographed the garden for possible future stories. Mike Darcy did an episode of his television show, In The Garden, from our front yard in late 2004. The article below was published in the former neighborhood paper, the North Portland Press, and was written by our friend Lisa Horne.

A Garden Treasure in North Portland

Ed Cunningham and Jeff Fisher have been together for 16 years and share many of the same interests, especially travel, gardening, entertainment, art, great food and wine. Ed is a gourmet chef and avid bicyclist. He occasionally bikes to work in downtown Portland where he is the business manager for the Portland office of Holland & Knight, LLP, an international law firm. Jeff is the Engineer of Creative Identity for his own graphic design firm, Jeff Fisher Logomotives, which he has owned for nearly years. Primarily a logo designer, Jeff has worked with clients from all over the world and has written a book about the graphic design business. His North Portland clients include Coyner’s Auto Body, James John Elementary School, Lampros Steel, North Portland Business Association, Peninsula Clean Team, Peninsula Community Development Corporation (publisher of the North Portland Press), Portland Relief Nursery, and Mike Verbout.

When did you move to North Portland?

We moved to the Arbor Lodge neighborhood of North Portland in the spring of 1997 after living in a Pearl District loft for five years. The loft had a little 2" x 3" balcony which allowed for very limited container gardening. A friend called one night and left a lengthy message on our answering machine saying she had found the perfect house for us. Very early the next morning we drove up to the house and I immediately said to Ed, “I want to live here.”

Describe your house and property

Our house is your classic little 1928 Portland bungalow. The house had a history of being a “problem” in the neighborhood and the site of some drug trafficking. When we first moved in the front yard was totally unremarkable, with only a few rhododendrons, an old Peace rose, an unhealthy maple tree and an ash tree that was in bad shape. The front sloped to the sidewalk quite a bit making the grass difficult to mow and the lawn was in need of a lot of help. The back yard was in even worse shape—especially since the previous residents had not had garbage picked up and dumped everything in the back over several years.

When was your garden put in?

The crew from Joy Creek Nursery put in the hardscape (the brick wall, pavers across the median, the new cobblestone path to the porch and an irrigation system) following the plans of landscape designer John Caine in late summer of 1999. The initial plantings were installed by the nationally-known nursery in the early fall of that year. (Note: We've added and subtracted plants a great deal since then. Often becoming the "test garden" for future Joy Creek plant offerings)

What is in your garden?

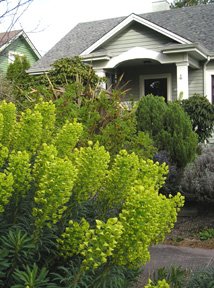
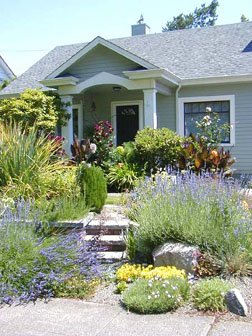
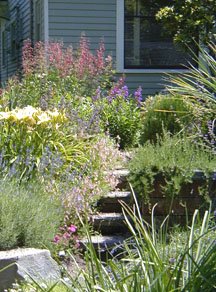
Median: The trees are a Forest Pansy Redbud with purple and green leaves that pick up many of the other colors in the yard and the colors of the house. Other plants include lavenders, rosemary, thyme, various sedums, ornamental grasses, Russian sage, lobelia tupa, coreopsis, cistus, yucca, oregano, geraniums, penstemons, crocosmia, salvia, kniphofia (Red Hot Poker) and numerous types of bulbs. The large euphorbia, with the vibrant green blooms, literally stops traffic. A huge ornamental thistle always brings comments about the large “weed” growing in the garden. Roses are planted to present blooms at just the right height for people walking by to “stop and smell the roses.” Herbs planted in the median are not used for cooking due to the bed’s use by visiting dogs.

Front: The bed at the top of the wall is mounded, so from the house you don’t see the street or sidewalk—which extends the vista of our garden to the city park across the street. It also gives the upper garden some privacy. The plantings include verbenas, anemones, heuchera, alstro-emeria, climbing roses on unusual metal sculpture trellises, lavenders, fuchsia, grasses, chocolate cosmo, datura, an ornamental dogwood, lobelia, rosemary, sedum, Japanese irises, lilies, hebe, hostas, helebores, calla lilies, ferns, shooting stars, purple sage, a bay laurel, hibiscus, dianthus, diascia, hydrangea, dahlias, rudbeckia, asters, veronica, a peony, ferns, saxifraga, phygelius and potentilla. The two large spiky eryngiums at the front of the garden add a dramatic flair, as do the brilliant orange canna which grows to over seven feet tall in the summer. A fun surprise in the garden are the leeks that also grow quite tall with their round blooms. In addition, Mike Smith, of Joy Creek Nursery, and Jeff planted over 750 bulbs in the front yard including crocus, tulips, snow drops, delicate irises, daffodils and others. One benefit of the garden is that it draws attention away from the large picture windows in the living and dining rooms of the house as people pass by. The garden has been designed to attract the maximum number of honey bees, bumble bees and hummingbirds.

Side: With the north side of the house being in shade most of the day the garden is a work in progress of ferns, bleeding hearts, miniature hostas, tricyrtis and other shade-loving plants.

Back: The back garden has a dual personality with both flowers and a vegetable garden. Ed, a gourmet cook, oversees the vegetable garden with its several varieties of tomatoes, beans, peas, kale, mustard greens, collards, salad greens, squash and raspberries. He also grows a wide variety of herbs for cooking including rosemary, basil, cilantro, thyme, oregano, marjoram and parsley.
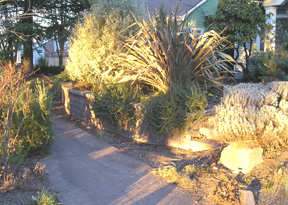
More of the North Portland Press article may be found in the blog entry Spring has sprung - Part Deux. Check out the redesign and renovation of my backyard garden in How does your garden grow?

© 2006 Jeff Fisher LogoMotives